

Treat your graduating superstar to a show-stopping centerpiece with this Decadent Tiered Chocolate-Frosted Graduation Cake. Celebrate achievements with stacked chocolate layers and creamy frosting, topped with festive graduation accents. Rich cocoa scents fill the kitchen as moist layers of chocolate cake bake to perfection. Each tier is slathered with silky chocolate buttercream, crowning it with caps and tassels for a celebration-worthy dessert that’s as fun to make as it is to devour. Ready to slice into success?
Key Ingredients
Before you get started, make sure you have these simple yet essential components on hand to build flavor, structure, and that irresistible chocolate punch.
- 3 cups all-purpose flour: Provides the sturdy base and tender crumb for each cake layer.
- 2 cups granulated sugar: Sweetens the batter and helps achieve a moist, soft texture.
- 1 cup unsweetened cocoa powder: Delivers deep chocolate flavor to every bite.
- 2 teaspoons baking powder: Acts as a leavening agent to lift the cake layers.
- 1 teaspoon baking soda: Works with acidic ingredients for extra rise and tenderness.
- 1 teaspoon salt: Balances sweetness and enhances overall flavors.
- 4 large eggs: Bind ingredients together and incorporate air for lightness.
- 1½ cups buttermilk: Adds moisture and a subtle tang, tenderizing the crumb.
- 1 cup vegetable oil: Keeps the cake layers ultra-moist and soft.
- 2 teaspoons vanilla extract: Infuses sweet, aromatic depth into the batter.
- 1 cup hot brewed coffee: Intensifies the chocolate notes and loosens the batter.
- 2 cups unsalted butter, room temperature: Creates a rich, creamy base for the frosting.
- 4 cups powdered sugar: Sweetens and thickens the buttercream to spreadable perfection.
- 1½ cups unsweetened cocoa powder: Powers the frosting with bold chocolate taste.
- 3 teaspoons vanilla extract: Brightens the buttercream with warm, floral notes.
- 6 tablespoons whole milk: Adjusts frosting consistency for smooth spreading.
- Assorted edible graduation-themed decorations: Personalizes the cake with fun caps, tassels, and celebratory accents.
How To Make Decadent Tiered Chocolate-Frosted Graduation Cake
You’re about to transform simple ingredients into a multi-layered marvel! This recipe walks you through baking two sizes of cake rounds, whipping up a silky chocolate buttercream, and stacking delicate tiers worthy of any grad celebration. Follow the detailed steps below, and you’ll have a professional-looking showpiece in no time!
1. Preheat the oven to 350°F and prepare the pans: Grease two 9-inch and two 6-inch round cake pans, then line the bottoms with parchment paper for easy release.
2. Combine dry ingredients: In a large bowl, whisk together flour, sugar, cocoa powder, baking powder, baking soda, and salt until evenly blended.
3. Incorporate wet ingredients: Add eggs, buttermilk, oil, and vanilla extract; beat on medium speed until the batter is smooth and homogenous. Slowly pour in the hot brewed coffee, mixing until fully incorporated.
4. Divide and smooth: Evenly distribute the batter between the prepared pans. Use a spatula to level the tops for uniform baking.
5. Bake the cakes: Place the 9-inch pans in the oven for 30–35 minutes and the 6-inch pans for 25–30 minutes. The cakes are done when a toothpick inserted in the center comes out clean.
6. Cool in pans, then remove: Let the cakes rest on wire racks for 10 minutes, then invert each pan, peel off the parchment, and allow the layers to cool completely.
7. Make the chocolate frosting: Beat room-temperature butter until creamy. Gradually add powdered sugar, cocoa powder, vanilla, and milk, beating until the buttercream is light, fluffy, and spreadable.
8. Level and stack the 9-inch tiers: Trim any domed tops with a serrated knife. Place one 9-inch layer on a cake board, spread 1 cup of frosting, then stack and repeat with the second layer.
9. Build the 6-inch tier: Center one 6-inch layer on the iced 9-inch base, frost its top, then add the final 6-inch layer. Apply a thin crumb coat over the entire cake to seal in loose crumbs.
10. Chill and finish: Refrigerate for 15 minutes to set the crumb coat. Then apply a final smooth layer of frosting and adorn with assorted edible graduation-themed decorations.
Serving Suggestions
This cake is a centerpiece and conversation starter, so let’s make serving just as memorable. Whether you’re hosting a backyard barbecue or a sit-down dinner, here are four creative ways to present slices with flair and ease:
- Colorful cake stand: Place the tiers on a vibrant stand to make the dark chocolate layers pop.
- Coordinated plates and napkins: Match dishware to your school colors for an Instagram-worthy dessert table.
- Garnish with fresh berries: Add a pop of bright red or blue on each plate to cut through the richness and add freshness.
- Individual ribbon wraps: Tie a thin ribbon around each slice’s fork or napkin for a personalized touch that guests can take home.
Tips For Perfect Decadent Tiered Chocolate-Frosted Graduation Cake
Baking a tiered cake can feel daunting, but these insider tricks will have you frosting like a pro and celebrating your grad in style! Keep your work area tidy, stay organized, and trust the process. With these simple insights, you’ll breeze through each layer and end up with a flawless finish.
- Ensure all ingredients are at room temperature for best cake texture.
- Use a rotating cake turntable for smoother frosting application.
- Chill between frosting layers to prevent sliding or bulging tiers.
- Decorate with piped messages or fondant caps to personalize the graduation theme.
How To Store It
Proper storage ensures your decadent creation remains moist, fluffy, and picture-perfect until the last forkful. Follow these methods to keep flavors locked in and textures just right, whether you’re saving slices for later or prepping ahead.
- Refrigerate: Cover the cake loosely with a cake dome or overturned bowl and store in the refrigerator for up to 4 days. Let slices warm at room temperature for 20–30 minutes before serving.
- Freeze slices: Wrap individual pieces tightly in plastic wrap, place in an airtight container, and freeze for up to 2 months. Thaw overnight in the fridge.
- Short-term room temperature: For the first 24 hours, store covered in a cool spot away from direct sunlight; this keeps the buttercream soft and creamy.
- Advance prep: Bake and cool layers up to a day ahead, wrap each in plastic wrap, and keep at room temperature; assemble and frost on the day of the event for freshest results.
Frequently Asked Questions
Got questions? I’ve got answers to help your tiered masterpiece turn out just right!
- Q: How long does it take to prepare and finish the Decadent Tiered Chocolate-Frosted Graduation Cake?
A: From start to finish, plan on about 2½ to 3 hours. Preparing the batter and baking both tiers takes roughly 1 hour. Cooling the cakes and leveling the layers adds another 30–40 minutes. Making the frosting, assembling the tiers, chilling between coats, and decorating will take about 1 hour.
- Q: Can I substitute buttermilk if I don’t have any on hand?
A: Yes. For each cup of buttermilk, pour one tablespoon of white vinegar or lemon juice into a measuring cup, then fill to the 1-cup line with milk. Let it sit for 5 minutes before using. This mixture mimics the acidity of buttermilk and helps the cake rise and stay tender.
- Q: What’s the best way to get perfectly even cake layers?
A: First, use a kitchen scale to divide the batter evenly between pans. After baking and cooling for 10 minutes in the pans, invert and remove parchment paper, then let the cakes cool completely. Use a long serrated knife or cake leveler to trim any domed tops into flat, even layers. Chilling the cakes briefly before leveling can make slicing cleaner.
- Q: How do I achieve a smooth, professional-looking frosting finish?
A: Start with a thin crumb coat on the entire cake and chill for 15 minutes to trap loose crumbs. Use a rotating cake turntable and a large offset spatula, applying the final frosting in smooth, continuous strokes while slowly spinning the turntable. Clean the spatula edge between passes to prevent dragging crumbs, and finish by gently warming the spatula under hot water, wiping it dry, then smoothing the surface.
- Q: How can I personalize the graduation-themed decorations?
A: Use fondant or modeling chocolate to shape mini graduation caps, diplomas, or numbers denoting the graduation year. Pipe custom messages like “Congrats Grad!” with tinted buttercream in contrasting colors. Edible gold or silver dust can add shimmer to mortarboards, and fresh flowers matching the school colors can be placed around the base of the tiers.
- Q: What’s the best way to store leftover cake?
A: Cover the cake loosely with a cake dome or large overturned bowl and refrigerate for up to 4 days. Allow chilled slices to sit at room temperature for 20–30 minutes before serving for the softest texture. You can also freeze individual slices wrapped tightly in plastic wrap and stored in an airtight container for up to 2 months; thaw overnight in the refrigerator.
- Q: Can I make the cake layers or frosting ahead of time?
A: Yes. You can bake and cool the cake layers a day in advance, wrap them in plastic wrap, and store them at room temperature. The frosting can be made up to two days ahead and refrigerated in an airtight container; bring it back to room temperature and re-beat it briefly before using to restore its texture.
- Q: Why is it important that all ingredients are at room temperature?
A: Ingredients like eggs, butter, and buttermilk blend more evenly when they share similar temperatures. Room-temperature eggs incorporate more air when beaten, contributing to a tender crumb, and room-temperature butter helps create a smoother, lump-free frosting. Cold ingredients can cause the batter or frosting to seize or separate.
What Makes This Special
This Decadent Tiered Chocolate-Frosted Graduation Cake truly shines because it marries rich, moist chocolate layers with a silky-smooth buttercream that’s as impressive to craft as it is to admire on the dessert table. The stacked tiers and festive decorations turn a simple cake into a celebration centerpiece, while the easy-to-follow steps keep even advanced home bakers smiling. Don’t forget to print this article and save it for future grad parties—and let me know how it turns out! Questions, feedback, or hilarious frosting mishaps are always welcome in the comments.
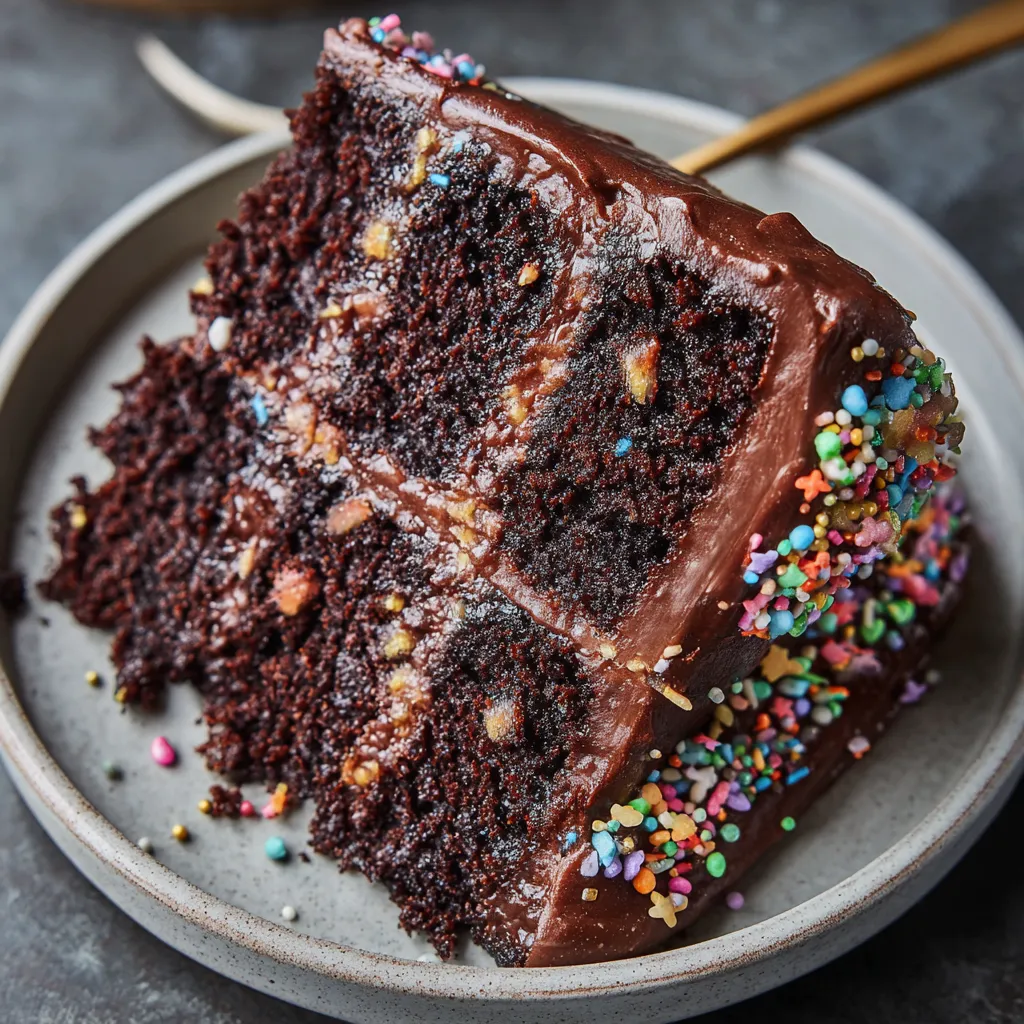

Decadent Tiered Chocolate-Frosted Graduation Cake
Description
Rich cocoa scents fill the kitchen as moist layers of chocolate cake are baked to perfection. Each tier is slathered in silky chocolate buttercream, then crowned with caps and tassels for a celebration-worthy centerpiece.
Ingredients
Instructions
-
Preheat oven to 350°F and grease two 9-inch round cake pans and two 6-inch round cake pans, then line bottoms with parchment paper.
-
In a large bowl whisk together flour, sugar, cocoa powder, baking powder, baking soda, and salt until evenly combined.
-
Add eggs, buttermilk, oil, and vanilla extract; beat on medium speed until smooth, then slowly stir in hot coffee until batter is well blended.
-
Divide batter evenly between prepared pans and smooth the tops with a spatula.
-
Bake 9-inch cakes for 30–35 minutes and 6-inch cakes for 25–30 minutes, or until a toothpick inserted into centers comes out clean.
-
Cool cakes in pans on wire racks for 10 minutes, then invert and remove parchment to cool completely.
-
While cakes cool, prepare chocolate frosting by beating butter until creamy, then gradually adding powdered sugar, cocoa powder, vanilla, and milk until light and fluffy.
-
Level cake tops with a serrated knife; place one 9-inch layer on cake board, spread 1 cup frosting, top with second 9-inch layer and repeat.
-
Stack one 6-inch layer centered on the iced 9-inch tier, frost top of first 6-inch layer, then place second 6-inch layer and apply a thin crumb coat over entire cake.
-
Chill cake for 15 minutes, then apply final smooth layer of frosting and decorate with edible graduation-themed decorations.
Note
- Ensure all ingredients are at room temperature for best cake texture.
- Use a rotating cake turntable for smoother frosting application.
- Chill between frosting layers to prevent sliding or bulging tiers.
- Decorate with piped messages or fondant caps to personalize the graduation theme.

