

There is something undeniable about the classic flavors of fall, but sometimes the traditional pastry shell leaves a bit to be desired. This Decadent Pumpkin Pie Brûlée solves that texture dilemma perfectly by trading a potentially soggy crust for a satisfying, torch-fired sugar shell. You get to break through that golden, crackling top to reveal a silky, spiced pumpkin custard underneath that feels elegant yet comforting. It is the ultimate textural contrast for your next gathering, and honestly, playing with a kitchen torch makes the baking process so much more fun. You have to give this a try!
Key Ingredients
To achieve that velvety consistency and rich autumn flavor, we rely on a specific set of staples. The beauty of this recipe lies in how these simple, pantry-friendly items transform into something that feels incredibly luxurious. From the richness of the cream to the warmth of the spices, every element plays a crucial role in building the final custard.
- 1 ½ cups pumpkin purée (canned or homemade): The star of the show that provides the earthy base flavor and signature orange hue for the custard.
- 1 cup heavy cream: Adds a luxurious richness and fat content necessary for a silky, melt-in-your-mouth texture.
- ½ cup whole milk: Balances the thickness of the cream to ensure the custard isn't too heavy while keeping it tender.
- ¾ cup granulated sugar: Sweetens the pumpkin base perfectly without overpowering the natural spices.
- 3 large eggs: The essential binder that allows the custard to set properly while maintaining a smooth consistency.
- 1 teaspoon vanilla extract: enhancing the overall flavor profile with a sweet, aromatic depth.
- 1 teaspoon ground cinnamon: The primary warming spice that gives this dessert its classic fall character.
- ½ teaspoon ground nutmeg: Adds a nutty, slightly sweet warmth that pairs beautifully with the cream.
- ½ teaspoon ground ginger: Provides a subtle spicy kick that cuts through the richness of the dairy.
- ¼ teaspoon salt: A crucial addition to balance the sweetness and pop the flavors of the spices.
- ½ cup brown sugar (for brûlée topping): Used to create the signature hard, caramelized shell on top of the custard.
- Whipped cream (for serving, optional): A light and airy contrast to the rich custard and crunchy sugar topping.
- Cinnamon stick (for garnish, optional): Adds a festive visual touch and extra aroma to the final presentation.
How To Make Decadent Pumpkin Pie Brûlée
This recipe might sound fancy because of the French name, but the process is actually quite straightforward. We are essentially making a pumpkin pie filling, but instead of worrying about rolling out dough, we are focusing on technique to get the smoothest possible texture. The key here involves mixing your wet and dry ingredients thoroughly, straining the mixture to remove any impurities, and baking it gently in a water bath. This ensures the eggs cook slowly without scrambling. Finally, the fun part comes at the end with the caramelization of the sugar.
1. Preheat your oven to 350°F (175°C). Prepare a baking dish by placing it on a baking sheet; this will help make transferring to and from the oven easier and prevents water from sloshing out later.
2. In a large mixing bowl, combine the pumpkin purée, heavy cream, and whole milk. Whisk together until the mixture is completely smooth and well incorporated.
3. Add the granulated sugar, eggs, vanilla extract, ground cinnamon, ground nutmeg, ground ginger, and salt to the mixture. Whisk vigorously until everything is fully combined and smooth.
4. Strain the mixture through a fine-mesh sieve into another bowl or pour it directly into individual ramekins to remove any lumps or chalaza from the eggs for a silky texture.
5. Evenly pour the pumpkin mixture into the prepared ramekins, filling them about three-quarters full to allow space for the topping.
6. Carefully add hot water to the baking dish, ensuring it reaches halfway up the sides of the ramekins. This will create a water bath to help the custards cook evenly and gently.
7. Bake in the preheated oven for about 30-35 minutes or until the custards are set but still slightly jiggly in the center.
8. Once done, remove the ramekins from the water bath and allow them to cool to room temperature. Then, refrigerate for at least 2 hours, or until chilled thoroughly.
9. Before serving, sprinkle about a tablespoon of brown sugar evenly over the top of each chilled custard.
10. Using a kitchen torch, carefully caramelize the brown sugar until it forms a crispy, golden layer. Alternatively, you can broil them in the oven on high for a couple of minutes, making sure to keep a close eye on them to avoid burning.
11. Allow the brûlée to cool for a minute before serving so the sugar hardens. Optionally, top with whipped cream and garnish with a cinnamon stick.
Serving Suggestions
Presenting these ramekins is almost as fun as eating them. Since the flavor profile is rich and spicy, you want to serve them in a way that highlights the contrast between the cold custard and the warm, crackling sugar top. It is best to serve these immediately after torching the sugar to ensure that signature "crack" sound when your guests dig in. Here are a few ways to elevate the experience.
- Classic Cloud Topping: Add a generous dollop of homemade whipped cream right on the edge of the caramelized sugar. The cool, airy cream balances the intense sweetness of the hard sugar shell perfectly.
- Spice Garnish: Place a whole cinnamon stick or a light dusting of freshly grated nutmeg on the saucer next to the ramekin. This adds an aromatic dimension that hits the nose before the spoon even hits the custard.
- Coffee Pairing: Serve this dessert alongside a strong shot of espresso or a dark roast coffee. The bitterness of the coffee cuts through the rich, creamy sweetness of the pumpkin custard, cleansing the palate between bites.
- Crunchy Sidekick: Offer a thin gingersnap cookie on the side of the saucer. This echoes the ginger in the custard and provides an extra vessel for scooping up any leftover cream or filling.
Tips For Perfect Decadent Pumpkin Pie Brûlée
If you want to take this recipe from "good" to "unforgettable," a few small tweaks can make a massive difference. I know that working with custards can sometimes feel a bit technical, but these notes are designed to give you flexibility and confidence. Whether you are prepping for a big Thanksgiving dinner or just a Tuesday night treat, these little adjustments will help you tailor the flavor and texture to your exact liking.
- For an extra layer of flavor, consider adding a pinch of clove or allspice to the custard mixture to deepen the spice profile.
- If you can’t find pumpkin purée, you can roast fresh pumpkin and blend it until smooth for a fresher, more vibrant taste.
- This dessert can be made a day in advance, just be sure to brûlée the sugar right before serving for the best texture, as the sugar will soften in the fridge.
- Feel free to customize the spices according to your taste preferences; if you love ginger, add a little more, or dial back the nutmeg if you prefer a milder flavor.
How To Store It
Since this dessert relies heavily on dairy and eggs, proper storage is essential for food safety and texture maintenance. While the caramelized top is best enjoyed immediately, the base custard holds up wonderfully in the fridge, making this a fantastic make-ahead option for busy hosts. Here is how to keep your custards fresh.
- Refrigerate the Custard Base: Store the baked and cooled custards in the refrigerator for up to 3 days before adding the sugar topping. This allows the flavors to meld even further.
- Plastic Wrap Technique: When storing the chilled custards, cover each ramekin tightly with plastic wrap. Ensure the wrap does not touch the surface of the custard to prevent condensation from pooling and ruining the smooth top.
- Avoid Freezing: It is best not to freeze these custards, as the freezing and thawing process can cause the heavy cream and eggs to separate, leading to a grainy texture and watery consistency.
- Post-Torch Storage: If you have leftovers that have already been torched (which is rare!), store them in the fridge, but be aware the crispy sugar shell will turn into liquid caramel after a few hours due to the moisture in the fridge.
Frequently Asked Questions
I know that making crème brûlée at home can raise a few questions, especially regarding the equipment and baking techniques. Here are the answers to the most common queries to help you bake with confidence.
- Q: Why is it necessary to bake the ramekins in a water bath?
A: According to step 6, placing the ramekins in a baking dish with hot water that reaches halfway up their sides helps the custards cook evenly. This technique regulates the heat to ensure the texture remains smooth and prevents the edges from overcooking before the center sets.
- Q: What is the purpose of straining the mixture through a fine-mesh sieve?
A: Step 4 advises straining the mixture to remove any potential lumps from the pumpkin purée or spices. This step is crucial for achieving the silky texture characteristic of a high-quality custard or brûlée.
- Q: How can I tell when the custards are fully baked?
A: The recipe states in step 7 that the custards should bake for about 30-35 minutes. You will know they are ready when they appear set but are still slightly jiggly in the center when the ramekin is gently moved.
- Q: Can I make this dessert if I do not own a kitchen torch?
A: Yes, step 10 offers an alternative method. You can sprinkle the brown sugar over the chilled custard and broil it in the oven on high for a couple of minutes to caramelize the sugar, though you must watch it closely to avoid burning.
- Q: Is it possible to prepare this recipe in advance?
A: Yes, the notes indicate that this dessert can be made a day in advance. You should bake the custards and refrigerate them for at least 2 hours or overnight, but you should wait to brûlée the brown sugar topping until right before serving for the best crispy texture.
- Q: Can I use fresh pumpkin instead of canned purée?
A: Yes, if you cannot find canned pumpkin purée, the recipe notes suggest that you can roast fresh pumpkin and blend it until it is smooth to use as a substitute in the filling.
What Makes This Special
This recipe really works because it takes the nostalgic, comforting flavor of pumpkin pie and elevates it with that irresistible, glass-like sugar top. It bridges the gap between a rustic home-baked treat and a high-end restaurant dessert, and yet, it is completely achievable in your own kitchen. The intermediate difficulty level is just enough to make you feel like a pro chef without causing a meltdown. Plus, who doesn't love an excuse to use a blowtorch in the kitchen? Be sure to print this article or save it to your bookmarks for your next holiday menu. If you try it, leave a comment below—I’d love to hear how your sugar shell turned out!
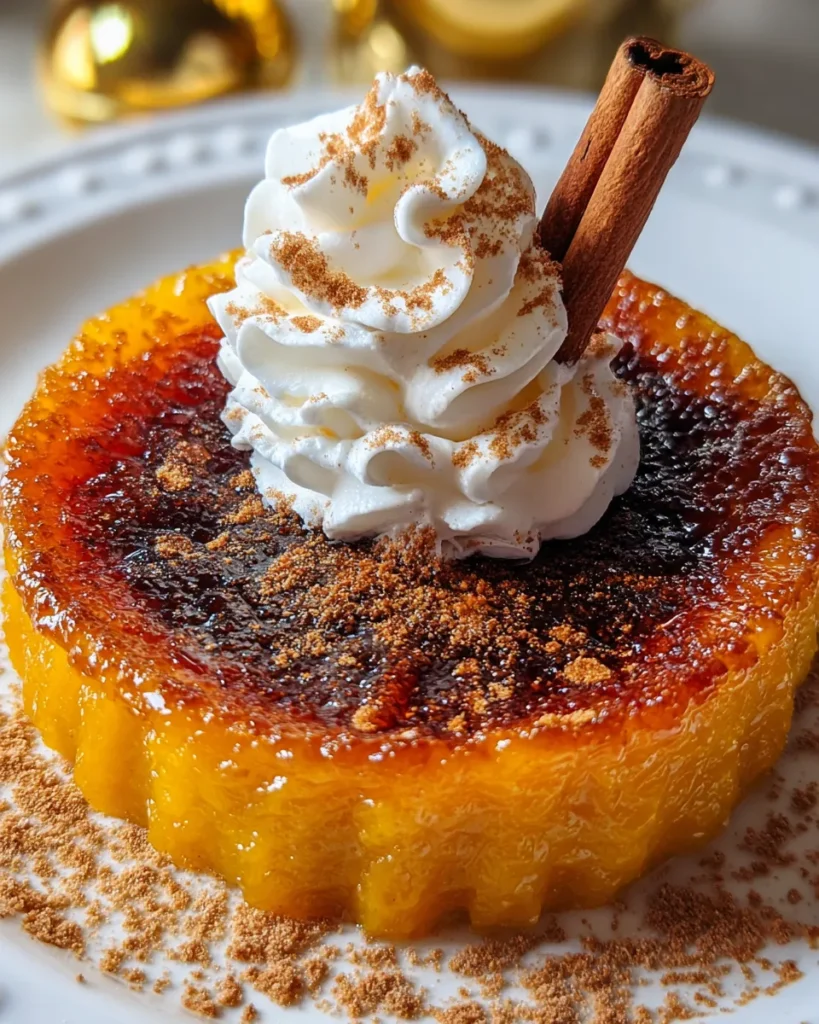

Decadent Pumpkin Pie Brûlée
Description
Break through the golden, crackling sugar top to find a silky, spiced pumpkin custard underneath. It’s the perfect textural contrast for your next fall gathering.
Ingredients
Instructions
-
Preheat your oven to 350°F (175°C). Prepare a baking dish by placing it on a baking sheet; this will help make transferring to and from the oven easier.
-
In a large mixing bowl, combine the pumpkin purée, heavy cream, and whole milk. Whisk together until smooth and well incorporated.
-
Add the granulated sugar, eggs, vanilla extract, ground cinnamon, ground nutmeg, ground ginger, and salt to the mixture. Whisk until everything is fully combined and smooth.
-
Strain the mixture through a fine-mesh sieve into another bowl or pour it directly into individual ramekins to remove any lumps for a silky texture.
-
Evenly pour the pumpkin mixture into the prepared ramekins, filling them about three-quarters full.
-
Carefully add hot water to the baking dish, ensuring it reaches halfway up the sides of the ramekins. This will create a water bath to help the custards cook evenly.
-
Bake in the preheated oven for about 30-35 minutes or until the custards are set but still slightly jiggly in the center.
-
Once done, remove the ramekins from the water bath and allow them to cool to room temperature. Then, refrigerate for at least 2 hours, or until chilled.
-
Before serving, sprinkle about a tablespoon of brown sugar evenly over the top of each chilled custard.
-
Using a kitchen torch, carefully caramelize the brown sugar until it forms a crispy, golden layer. Alternatively, you can broil them in the oven on high for a couple of minutes, making sure to keep a close eye on them to avoid burning.
-
Allow the brûlée to cool for a minute before serving. Optionally, top with whipped cream and garnish with a cinnamon stick.
Note
- For an extra layer of flavor, consider adding a pinch of clove or allspice to the custard mixture.
- If you can’t find pumpkin purée, you can roast fresh pumpkin and blend it until smooth.
- This dessert can be made a day in advance, just be sure to brûlée the sugar right before serving for the best texture.
- Feel free to customize the spices according to your taste preferences.

