

Decadent Layered Buttercream Graduation Cake is the ultimate celebration centerpiece, boasting three fluffy layers slathered in velvety pastel buttercream, crowned with sprinkles and celebratory lettering. Flour, sugar, and eggs transform into airy cake layers surrounded by creamy frosting tinted in your school colors. Each bite’s soft crumb and sweet swirl feels like a graduation party in every mouthful—perfect for marking this milestone with style and flavor. Ready to make a show-stopping dessert that your grads (and guests) will rave about? Let’s dive in!
Key Ingredients
Here’s what you’ll need to create this stunning graduation cake—each ingredient plays a crucial role in building tender layers and dreamy buttercream.
- 2 cups sifted all-purpose flour: Provides structure and ensures a light, tender crumb in every slice.
- 2 teaspoons baking powder: Leavening agent that gives the cake its fluffy rise.
- 1 teaspoon baking soda: Works alongside baking powder for consistent lift.
- 1 teaspoon salt: Balances sweetness and enhances overall flavor.
- 1 cup unsalted butter softened (for cake batter): Adds richness and moisture for a tender texture.
- 2 cups granulated sugar: Sweetens the batter and helps create that delightful crust.
- 4 large eggs at room temperature: Bind ingredients and contribute to structure and moisture.
- 1 cup whole milk at room temperature: Keeps the batter smooth and adds richness.
- 2 teaspoons pure vanilla extract: Infuses classic vanilla aroma throughout the layers.
- 1 cup unsalted butter softened (for buttercream): Base of the frosting for a luscious mouthfeel.
- 5 cups powdered sugar sifted: Sweetens and thickens the buttercream to pipeable consistency.
- 2 teaspoons pure vanilla extract (for buttercream): Enhances the buttery sweetness of the frosting.
- 2–3 tablespoons heavy cream: Adjusts frosting consistency for smooth spreading.
- food coloring as desired: Transforms buttercream into vibrant school-spirit hues.
- decorative sprinkles or edible decorations: Crowns the cake with festive flair.
- piping gel or icing pen for lettering: Allows you to add personalized graduation messages.
How To Make Decadent Layered Buttercream Graduation Cake
Baking and assembling this cake is a rewarding process that combines classic layering techniques with simple decorating steps. From prepping the pans to adding that final swirl of frosting, each stage is designed to help you achieve a professional-looking result right at home. Follow these detailed steps for a smooth baking experience and flawless finish.
1. Preheat and prepare: Preheat your oven to 350°F. Generously grease three 8-inch round cake pans and dust them with flour to prevent sticking.
2. Combine dry ingredients: In a bowl, whisk together the flour, baking powder, baking soda, and salt until evenly distributed.
3. Cream butter and sugar: In a separate large bowl, use an electric mixer to beat the softened butter and granulated sugar until light and fluffy, about 3–4 minutes.
4. Add eggs and vanilla: Beat in the eggs one at a time, ensuring each is fully incorporated before adding the next. Stir in the vanilla extract until smooth.
5. Alternate dry mix and milk: Add the dry ingredients in three additions, alternating with the milk—start and end with the dry mix. Mix on low speed to avoid over-working the batter.
6. Divide and smooth: Evenly divide the batter among the prepared pans. Use a spatula to smooth the tops for even layers.
7. Bake: Place the pans on the center rack and bake for 25–30 minutes, or until a toothpick inserted in the center comes out clean.
8. Cool cakes: Let the cakes cool in the pans for 10 minutes. Then turn them out onto wire racks to cool completely before frosting.
9. Make the buttercream: In a mixing bowl, beat the softened butter, powdered sugar, vanilla extract, and heavy cream until smooth and fluffy. Add food coloring to reach your desired shade.
10. Layer and crumb coat: Place one cake layer on a serving plate, spread a layer of buttercream, then stack the remaining layers. Apply a thin crumb coat around the cake to seal in crumbs.
11. Chill and frost: Chill the crumb-coated cake for 20 minutes. Then apply a final, smooth layer of buttercream and decorate with sprinkles and piped borders.
12. Lettering and final chill: Use piping gel or an icing pen to write your graduation message on top. Chill for another 15 minutes before serving to set the frosting.
Serving Suggestions
Want to elevate your graduation cake experience? Here are four fun ways to plate and enjoy this buttery masterpiece:
- Classic slices with coffee: Serve warm cake slices with freshly brewed coffee to balance the sweetness and highlight the tender crumb.
- Fruit-topped elegance: Add fresh berries or sliced stone fruit on each plate for a burst of color and refreshing contrast.
- Ice cream à la mode: Pair a slice with a scoop of vanilla or berry sorbet for a cool, creamy complement.
- Dessert charcuterie board: Cut small cake squares and arrange alongside chocolate truffles, nuts, and fruit for a party-style spread.
Tips For Perfect Decadent Layered Buttercream Graduation Cake
A flawless graduation cake is within reach! With a few insider pointers, you’ll breeze through each step and wow your guests. Here’s how to make every layer and swirl shine:
- Ensure all ingredients are at room temperature for a smooth batter.
- Chill the cake after the crumb coat for easier final frosting application.
- Customize colors to match school or party theme, adding food coloring gradually.
- Store leftover cake covered in the refrigerator for up to 3 days to maintain freshness.
How To Store It
Proper storage guarantees your cake stays moist, flavorful, and photo-ready for days after graduation day. Whether you have leftovers or need to prep in advance, here’s what to do:
- Refrigerate in an airtight cake carrier or cover loosely with plastic wrap to prevent the buttercream from absorbing fridge odors.
- Leave at cool room temperature (below 70°F) for up to 24 hours if you prefer not to chill it immediately—just cover well.
- Freeze individual cake layers (unfrosted) by wrapping tightly in plastic wrap and foil; thaw overnight in the refrigerator before assembling.
- Freeze a fully assembled cake by chilling it first, then wrapping in plastic and foil; thaw in the fridge overnight for best texture.
Frequently Asked Questions
Here are quick answers to the top questions home bakers ask about this show-stopping cake:
- Q: How long does it take to prepare and assemble this Decadent Layered Buttercream Graduation Cake?
From start to finish, plan for about 2 hours and 15 minutes, including mixing, baking, cooling, frosting, chilling, and decorating.
- Q: What can I do if my cake layers dome or crack on top?
Use an oven thermometer, bake pans on the same rack, and level any small domes with a serrated knife once fully cooled.
- Q: Can I substitute any ingredients to accommodate dietary restrictions or preferences?
Yes—swap in unsweetened plant-based milk, replace part of the cream with coconut cream, or use a 1:1 gluten-free flour blend.
- Q: How should I store leftover cake to maintain freshness and flavor?
Store in an airtight carrier in the fridge for up to 3 days; let it come to room temperature before serving.
- Q: What techniques ensure a smooth, professional-looking buttercream finish?
Apply a crumb coat, chill for at least 20 minutes, use an offset spatula and bench scraper on a turntable, then chill again.
- Q: How can I achieve vibrant, consistent colors in the buttercream?
Use gel or paste food coloring, add it gradually, and let the color develop before adding more.
- Q: Is it possible to freeze the cake layers or the fully assembled cake?
Yes—freeze unfrosted layers wrapped tightly for up to 2 months; wrap and freeze a chilled, frosted cake, then thaw in the fridge.
What Makes This Special
This Decadent Layered Buttercream Graduation Cake isn’t just any dessert—it’s a celebration in every slice. The three airy, buttery layers paired with smooth, pastel-tinted frosting make each bite a heartwarming nod to achievement. Decorating with school-color sprinkles and a personalized message transforms a homemade cake into a festive centerpiece. Print and save this guide, then whip it out whenever you need a crowd-pleasing showstopper. Have questions, tweaks, or fun decorating stories? Drop a comment and share your graduation-cake triumphs!
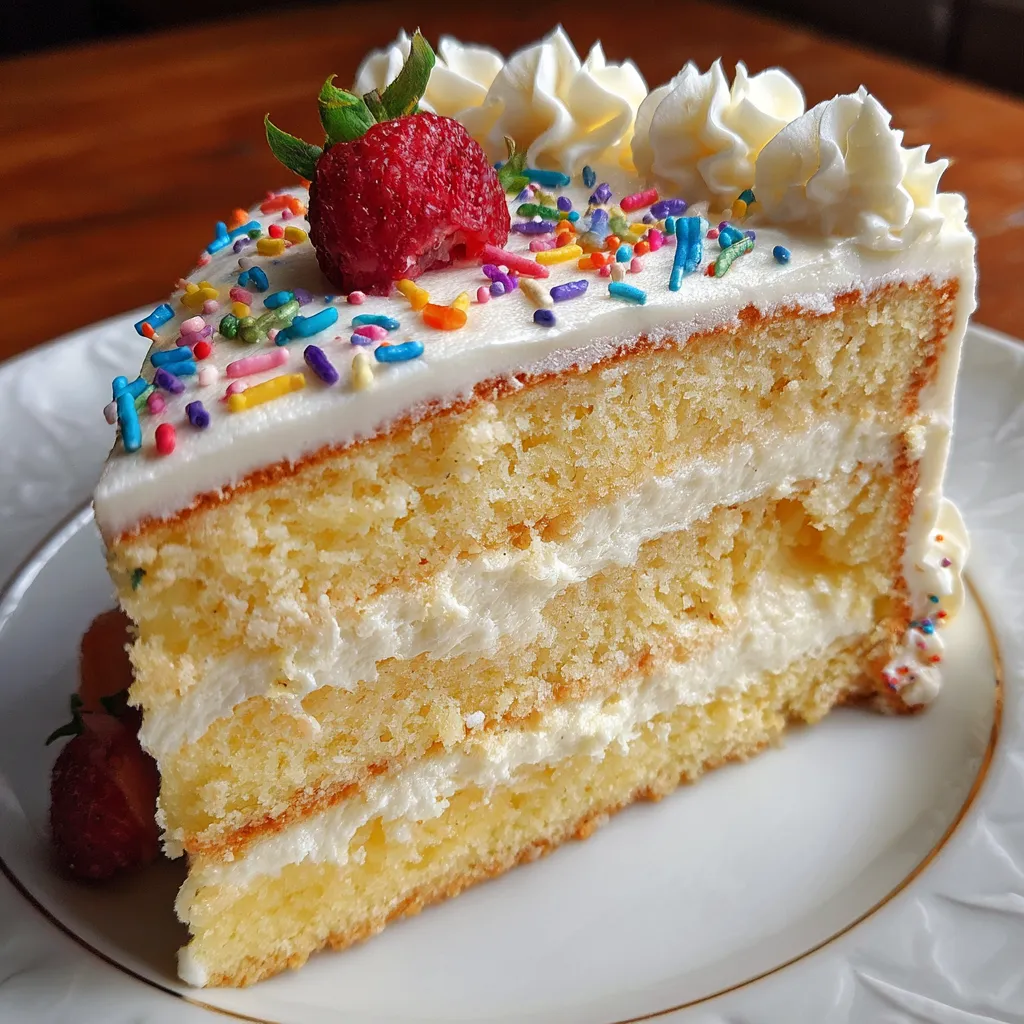

Decadent Layered Buttercream Graduation Cake
Description
Flour, sugar and eggs transform into airy cake layers surrounded by creamy buttercream tinted in your school colors. Each bite’s soft crumb and sweet swirl feels like a graduation party in every mouthful.
Ingredients
Instructions
-
Preheat the oven to 350°F and grease and flour three 8-inch round cake pans.
-
In a bowl whisk together the flour, baking powder, baking soda, and salt.
-
In a separate large bowl cream the butter and granulated sugar until light and fluffy.
-
Beat in the eggs one at a time, then stir in the vanilla extract.
-
Add the dry ingredients in three additions alternating with the milk, beginning and ending with the dry mix.
-
Evenly divide the batter among the prepared pans and smooth the tops.
-
Bake for 25 to 30 minutes or until a toothpick inserted in the center comes out clean.
-
Allow the cakes to cool in the pans for 10 minutes, then turn out onto wire racks to cool completely.
-
Meanwhile, make the buttercream by beating the softened butter, powdered sugar, vanilla extract, and heavy cream until smooth, adding food coloring as desired.
-
Place one cake layer on a serving plate, spread a layer of buttercream, then stack the remaining layers and apply a thin crumb coat around the cake.
-
Chill the cake for 20 minutes, then apply a final smooth layer of buttercream and decorate with sprinkles and piped borders.
-
Use piping gel or icing pen to write a graduation message on top, then chill for another 15 minutes before serving.
Note
- Ensure all ingredients are at room temperature for a smooth batter.
- Chill the cake after the crumb coat for easier final frosting.
- Customize colors to match school or party theme.
- Store leftover cake covered in the refrigerator for up to 3 days.

