

There’s something incredibly satisfying about biting into a freshly baked brownie that’s just the right balance of fudgy, chocolatey, and slightly crackly on top. These gluten-free chocolate brownies take that blissful moment up a notch by ensuring anyone with dietary restrictions doesn’t miss out on dessert magic. As you stir the glossy batter, the rich cocoa blends seamlessly with melted chocolate, sugar, and butter—the promise of indulgence is palpable. While traditional brownies might leave you questioning whether that missing gluten makes any real difference, these brownies prove that you can have your cake (or brownie) and eat it too, without a worry in the world.
Over the years, I’ve experimented with countless flour blends and baking tricks, but this recipe truly stands out in my kitchen repertoire. The secret lies in combining a reliable gluten-free all-purpose flour with just the right amount of cocoa powder and a whisper of baking powder to give structure without sacrificing the dense, chewy texture. Whether you’re baking for a gluten-sensitive friend, a special event, or simply craving a chocolate fix, these brownies deliver on every front. They hold together beautifully, slice cleanly, and freeze like champs for future snacking emergencies. Get ready to savor each decadent square!
KEY INGREDIENTS IN DECADENT GLUTEN-FREE CHOCOLATE BROWNIES
Before diving in, let’s talk about the stars of the show. Each ingredient plays a vital role in creating that fudgy texture, rich flavor, and gluten-free integrity that make these brownies unforgettable.
- Unsalted butter
Provides a smooth, creamy base and enhances the mouthfeel, allowing the chocolate to melt seamlessly into the batter without extra salt altering the flavor balance.
- Granulated sugar
Sweetens the brownies while helping to create that signature crackly top as it melts and re-crystallizes during baking.
- Pure vanilla extract
Amplifies the chocolate notes and adds a warm, aromatic depth that makes every bite feel homey and comforting.
- Large eggs
Bind all the ingredients together, contribute to structure, and trap tiny air bubbles as you whisk, giving lift and a tender crumb.
- Gluten-free all-purpose flour
Replaces traditional wheat flour with a blend of rice flour, potato starch, and other gluten-free starches to maintain texture without dryness.
- Unsweetened cocoa powder
Intensifies the chocolate flavor and adds color, while absorbing just enough moisture to keep the brownies dense and fudgy.
- Baking powder
Provides a gentle lift so that the brownies aren’t too flat, without creating a cakey texture.
- Salt
Balances sweetness and enhances chocolate depth, preventing the brownies from tasting one-dimensional.
- Semi-sweet chocolate chips or chunks
Offer pockets of melted chocolate throughout each bite, adding gooey richness and visual appeal.
- Chopped nuts (pecans or walnuts)
Introduce a crunchy contrast and nutty flavor that complements the chocolate—optional but highly recommended for texture lovers.
HOW TO MAKE DECADENT GLUTEN-FREE CHOCOLATE BROWNIES
Baking these brownies is straightforward, even if you’re new to gluten-free cooking. With simple techniques like melting, whisking, sifting, and folding, you’ll create a silky batter that bakes into perfectly fudgy squares.
1. Preheat your oven to 350°F (175°C). Line an 8×8 inch (20×20 cm) baking dish with parchment paper, leaving some overhang on two sides for easy removal later.
2. In a microwave-safe bowl, combine the butter and half of the chocolate chips. Microwave in 20-second intervals, stirring in between, until the mixture is fully melted and smooth, ensuring the chocolate doesn’t scorch.
3. In a large mixing bowl, whisk together the sugar, vanilla extract, and eggs until the mixture becomes pale and slightly fluffy, which helps incorporate air for lift.
4. Slowly pour the melted chocolate mixture into the egg mixture, whisking continuously to create a homogenous, glossy batter without cooking the eggs.
5. Sift in the gluten-free flour, cocoa powder, baking powder, and salt over the wet ingredients. Gently fold the dry ingredients into the batter using a spatula until no dry streaks remain—overmixing can make brownies tough.
6. Fold in the remaining chocolate chips and the optional chopped nuts, distributing them evenly for pockets of gooey chocolate and crunchy bites.
7. Pour the batter into the prepared baking dish, then use an offset spatula or the back of a spoon to spread it evenly into corners for uniform thickness.
8. Bake in the preheated oven for 25–30 minutes, or until a toothpick inserted into the center comes out with a few moist crumbs attached. Resist the urge to overbake if you crave a fudgy interior.
9. Allow the brownies to cool in the pan on a wire rack for 10 minutes. Then use the parchment overhang to carefully lift them out of the pan and cool completely on the rack.
10. Slice into 16 squares using a sharp knife, wiping the blade between cuts for clean edges, and serve.
SERVING SUGGESTIONS FOR DECADENT GLUTEN-FREE CHOCOLATE BROWNIES
Serving these brownies in style is almost as fun as baking them. The right accompaniments and presentation can transform a simple dessert into a showstopper that delights friends and family. Whether you’re hosting a casual get-together or savoring a quiet evening with a book, consider pairing your brownies with something that balances sweetness, texture, and temperature. You might already have your favorite go-to, but these ideas will add a touch of flair without stealing the spotlight from that rich, fudgy center. Remember, the key to a memorable serving experience is contrast—whether it’s heat and cold, creamy and crunchy, or sweet paired with a hint of tartness.
- Warm with a Scoop of Ice Cream
Serve a brownie square straight from the oven with a generous scoop of vanilla or coffee ice cream on top, letting it melt into the warm edges for a gooey, melt-in-your-mouth experience.
- Dust with Powdered Sugar
After the brownies have cooled slightly, use a fine mesh sieve to gently sift powdered sugar across the tops, creating a delicate snow-dusted look that’s elegant yet simple.
- Pair with Fresh Berries
Arrange a handful of plump raspberries or sliced strawberries on the side to cut through the sweetness with a bright, tart contrast—and add a pop of color to your platter.
- Drizzle with Caramel Sauce
Warm your favorite store-bought or homemade caramel and use a spoon or squeeze bottle to create a decorative swirl over each brownie for added richness and a hint of sea salt if you like sweet-and-salty.
HOW TO STORE DECADENT GLUTEN-FREE CHOCOLATE BROWNIES
Proper storage will keep your brownies tasting fresh, fudgy, and just as irresistible days after baking. Since gluten-free baked goods can sometimes dry out faster than their wheat-based counterparts, it’s crucial to seal in moisture and protect them from air. Whether you plan to enjoy them over a long weekend or freeze some for later cravings, these methods will maintain that dreamy texture and flavor you worked so hard to achieve.
- Room Temperature in an Airtight Container
Stack cooled brownies in a single layer or separate layers with parchment paper. Seal them in a lidded container or resealable bag, keeping them at room temperature for up to three days without sacrificing moisture.
- Refrigeration for Up to a Week
Place brownies in a sealed glass container or wrap tightly in plastic wrap, then store in the fridge. Always let them sit at room temperature for 10–15 minutes before serving to soften the chocolate centers.
- Freezing for Long-Term Storage
Individually wrap brownies in plastic wrap, then place them in a freezer-safe zipper bag or container. They’ll stay fresh for up to three months. When you’re ready, thaw overnight in the refrigerator or for an hour on the counter.
- Vacuum Sealing for Maximum Freshness
If you have a vacuum sealer, use it to remove air from your brownie storage bag. This method locks in moisture and flavors extremely well, extending freezer life and reducing freezer burn.
CONCLUSION
Baking these Decadent Gluten-Free Chocolate Brownies is more than just following a recipe—it’s crafting a moment of pure chocolate joy that anyone can enjoy, regardless of dietary restrictions. From the first whisk of sugar and eggs to the final slice of fudgy, crackly-topped goodness, this recipe delivers an indulgent experience that feels both comforting and special. The blend of melted chocolate, rich cocoa, and a gluten-free flour base proves that you don’t have to compromise on flavor or texture. Whether you serve them warm with ice cream or pack them for a sweet afternoon treat, these brownies strike the perfect balance between ease and decadence. Feel free to print this article and save it in your favorite recipe binder; the clear steps and handy tips will guide you every time your chocolate cravings strike.
I’m thrilled you’ve taken the time to explore these rich, fudgy brownies, and I hope they become a staple in your baking repertoire. You can find a FAQ section below for troubleshooting, dietary swaps, and extra tips to make this recipe your own. If you give these brownies a try, I’d love to hear how they turned out—drop a comment, share your questions, or let me know if you invented any delicious twists. Your feedback helps me refine recipes, discover new flavor pairings, and continue sharing joyful baking adventures with this wonderful community. Happy baking!
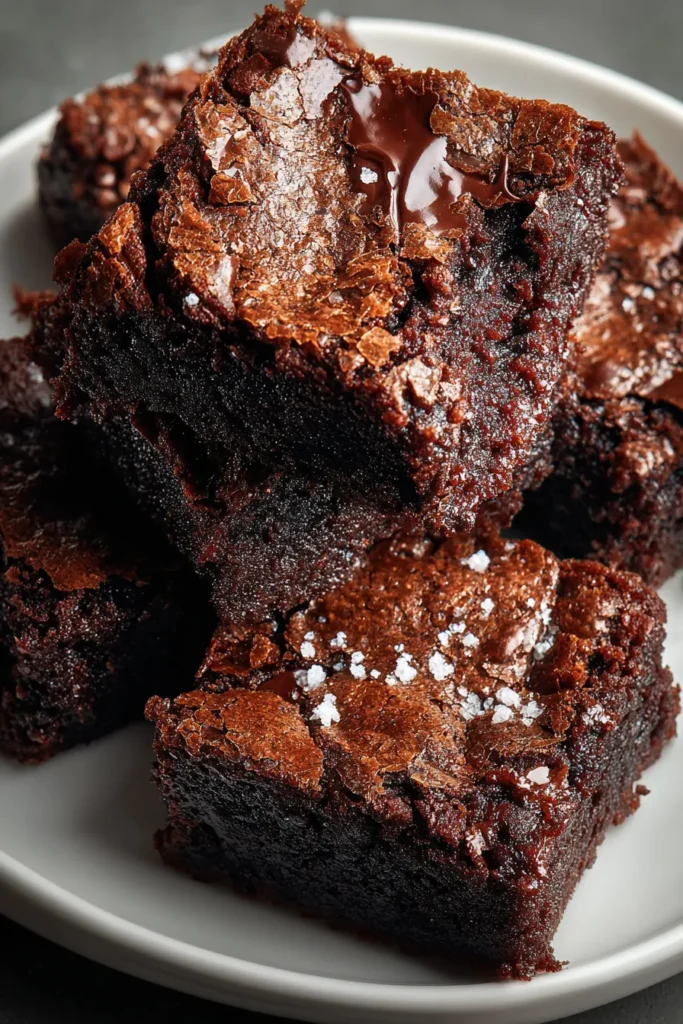

Decadent Gluten-Free Chocolate Brownies
Description
These decadent gluten-free chocolate brownies are incredibly moist and loaded with chocolate chips, making each bite a heavenly experience. Perfect for sharing or savoring on your own!
Ingredients
Instructions
-
Preheat your oven to 350°F (175°C). Line an 8x8 inch (20x20 cm) baking dish with parchment paper, leaving some overhang for easy removal later.
-
In a microwave-safe bowl, combine the butter and half of the chocolate chips. Microwave in 20-second intervals, stirring in between, until fully melted and smooth.
-
In a large mixing bowl, whisk together the sugar, vanilla extract, and eggs until light and fluffy.
-
Slowly pour the melted chocolate mixture into the egg mixture, whisking continuously until fully combined.
-
Sift in the gluten-free flour, cocoa powder, baking powder, and salt into the wet ingredients. Gently fold the dry ingredients into the batter until no dry spots remain.
-
Fold in the remaining chocolate chips and the optional nuts if using.
-
Pour the batter into the prepared baking dish, spreading it evenly using a spatula.
-
Bake in the preheated oven for 25-30 minutes or until a toothpick inserted into the center comes out with a few moist crumbs attached. Avoid overbaking for fudgier brownies.
-
Allow the brownies to cool in the pan for 10 minutes. Then use the parchment overhang to lift them out of the pan and cool completely on a wire rack.
-
Slice into squares and serve.
Note
- For extra rich brownies, use dark chocolate instead of semi-sweet in the batter.
- Add a pinch of espresso powder to enhance the chocolate flavor.
- These brownies store well at room temperature in an airtight container for up to 3 days or in the refrigerator for a week.
- You can freeze these brownies for up to 3 months; just thaw overnight in the refrigerator before serving.

