

Crunchy, sweet, and oh-so-decadent, these Chocolate-Dipped Butterfinger Balls are the ultimate indulgence for anyone craving a little nostalgia with a modern twist. Each bite delivers that unmistakable Butterfinger snap interwoven with creamy peanut butter, rolled into a smooth, sweet center before being bathed in a silky layer of milk chocolate. There’s an effortless magic to how the crushed candy bars combine with the powdered sugar to create a moldable mixture that begs to be shaped into perfect little spheres. From the first stir of peanut butter and vanilla to the final dip in glossy chocolate, this recipe is a joyful celebration of flavors and textures coming together in delightful harmony.
Whether you’re whipping these up on a lazy Sunday afternoon or preparing a show-stopping platter for your next holiday gathering, these bite-sized treats never fail to impress. You don’t need hours in the kitchen or fancy equipment—just a handful of pantry staples and a free half hour while the balls chill in the freezer. Kids can join in the fun too, rolling out each ball with sticky, chocolate-flavored fingers and earning proud smiles when they see their creations coated in rich, melting chocolate. They’re perfect for gifting, party favors, or sneaking a few during movie night; the mixer can be paused at any moment to taste-test, ensuring each ball is as sweet, crispy, and utterly irresistible as the last.
KEY INGREDIENTS IN DECADENT CRISPY CHOCOLATE-DIPPED BUTTERFINGER BALLS
Before diving into the fun, let’s chat about the star players in this recipe. Each ingredient brings its own role, creating a symphony of crunch, creaminess, and chocolatey bliss. Having them prepped and ready will make your assembly line a breeze.
- Crushed Butterfinger candy bars
These iconic bars add that signature crispy, flaky texture and sweet peanut-buttery crunch. When finely crushed, they become the flavorful backbone of the balls, ensuring each bite tastes unmistakably like your favorite candy bar.
- Creamy peanut butter
Smooth and velvety, peanut butter binds the crushed candy together while amplifying the nutty undertones. It lends moisture, richness, and just the right amount of savory contrast against the sweetness.
- Powdered sugar
Also known as icing sugar, this ingredient sweetens and firms up the mixture. It absorbs any extra oil from the peanut butter, giving the dough a silky, moldable consistency that’s easy to roll into neat balls.
- Vanilla extract
A splash of vanilla extract lifts the entire mixture, enhancing the flavors with a warm, aromatic note. It’s the secret layer of complexity that makes these treats taste so much more luxurious.
- Milk chocolate chips
These chips melt into a smooth, glossy coating that encases each ball in a sweet embrace. Milk chocolate’s creaminess perfectly complements the crisp center, creating a dreamy contrast of textures.
- Coconut oil
Added to the chocolate during melting, coconut oil thins the mixture for a smoother dip and a shinier finish. It also helps the chocolate set quickly and snap cleanly when you bite into it.
HOW TO MAKE DECADENT CRISPY CHOCOLATE-DIPPED BUTTERFINGER BALLS
Ready to roll up your sleeves? This section will guide you through each step of the process, ensuring your Butterfinger balls come out perfectly every time.
1. Begin by gathering all your ingredients and utensils. Lay out a mixing bowl, a baking sheet lined with parchment paper, and a microwave-safe bowl for melting chocolate so everything is within easy reach. Organization at this stage prevents any sticky surprises later on.
2. In the mixing bowl, combine the crushed Butterfinger candy bars, creamy peanut butter, powdered sugar, and vanilla extract. Use a sturdy spatula or your hands (wear food-safe gloves if you prefer) to mix everything together until well combined. The resulting mixture should be thick yet pliable, ready to be formed without sticking excessively.
3. Once the mixture is combined, use your hands to form small balls, about 1 inch in diameter. Roll each portion between your palms until smooth. Place the formed balls onto the lined baking sheet, keeping them spaced evenly apart to ensure they chill uniformly.
4. Once all of the Butterfinger balls are shaped, place the baking sheet in the freezer for about 30 minutes. This step is crucial to help them firm up and maintain their shape when you dunk them in chocolate.
5. While the Butterfinger balls are chilling, prepare the chocolate coating. In the microwave-safe bowl, combine the milk chocolate chips and coconut oil. Microwave in 30-second intervals, stirring thoroughly between each burst, until the chocolate is fully melted and smooth.
6. Once the Butterfinger balls are firm, remove them from the freezer. Dip each ball into the melted chocolate, ensuring they are fully coated. Use a fork to gently lift them out, allowing any excess chocolate to drip off before transferring back to the parchment paper.
7. Place the chocolate-dipped Butterfinger balls back onto the parchment-lined baking sheet. If desired, sprinkle some additional crushed Butterfinger or a pinch of sea salt on top for extra flair and flavor before the chocolate sets.
8. Allow the chocolate to harden at room temperature, or return the sheet to the refrigerator to speed up the process. Once set, serve at room temperature for the best texture, or store them in an airtight container in the fridge until you’re ready to enjoy.
SERVING SUGGESTIONS FOR DECADENT CRISPY CHOCOLATE-DIPPED BUTTERFINGER BALLS
When it comes to presenting these little gems, a thoughtful display can elevate the experience. Consider themes, color schemes, and complementary snacks to make your dessert table pop. Whether you’re hosting a birthday bash, a cozy brunch, or a festive holiday soirée, these Butterfinger balls fit right in. They bring a playful nostalgia that guests of all ages adore. Pair them with warm beverages, stack them in pretty jars, or tuck them into decorative cupcake liners for individual servings. Don’t shy away from experimenting with garnishes—drizzles of white chocolate, a light dusting of cocoa, or edible glitter can turn these simple bites into decadent masterpieces. Below are a few creative ways to serve them at your next gathering:
- Elegant Dessert Platter
Arrange the Butterfinger balls on a marble or wooden board, interspersed with fresh berries and mint leaves. This contrast of colors makes each bite feel like a mini work of edible art.
- Party Favor Cups
Scoop three or four balls into small clear cups or decorative containers. Tie a ribbon around each cup for a cute, grab-and-go treat that guests can take home.
- Coffee and Chocolate Pairing
Serve alongside small demitasse cups of espresso or rich hot chocolate. The intense coffee notes highlight the peanut butter and candy crunch, creating a café-style tasting menu.
- Dessert Buffet Accent
Nestle the balls among other bite-sized desserts like macarons, truffles, and mini brownies. Use stacked cake stands at varying heights to create visual interest and an irresistible dessert bar.
HOW TO STORE DECADENT CRISPY CHOCOLATE-DIPPED BUTTERFINGER BALLS
Keeping these Chocolate-Dipped Butterfinger Balls fresh and crisp is simpler than you might think. Whether you’re prepping well in advance for a party or making a big batch to nibble on throughout the week, proper storage will ensure every ball stays moist inside, crisp on the outside, and perfectly chocolatey. Pay attention to temperature, container choice, and layering techniques to avoid any unexpected sticking or texture changes. Below are some tried-and-true methods to maintain their peak flavor and crunch:
- Refrigerator Storage
Place the balls in a single layer inside an airtight container, separated by sheets of parchment or wax paper. Store in the coldest part of the fridge, ideally between 35–40°F, for up to one week.
- Freezer for Long-Term
For extended shelf life, arrange the balls on a baking sheet until frozen solid, then transfer them to a freezer-safe bag or container. They’ll last up to three months; just thaw in the refrigerator for 15–20 minutes before serving.
- Avoid Moisture
Humidity can turn crisp chocolate dull or cause centers to soften too much. Ensure your container seals tightly and include a small food-grade desiccant packet if you live in a very humid climate.
- Layering Technique
If stacking multiple layers, always place a sheet of parchment or wax paper between layers to prevent sticking and maintain the smooth chocolate coating on each ball.
CONCLUSION
Bringing this recipe to life is a celebration of simplicity and pure indulgence. From gathering a few pantry staples to unveiling a tray of glossy, chocolate-coated orbs, you’ll find joy in each step. The contrast of the Butterfinger’s crispy center and the luscious milk chocolate exterior delivers an unforgettable flavor combination that’s hard to resist. Whether you’re a seasoned home cook or a complete beginner, these no-bake Butterfinger balls are accessible, quick to prepare, and endlessly customizable. Feel free to experiment with dark chocolate, white chocolate, or even a drizzle of caramel—each variation opens a new world of taste sensations.
Don’t let these treats sit quietly in your recipe box—print this article, jot down notes in the margins, and save it for game nights, holiday celebrations, or any moment that calls for a sweet pick-me-up. Below, you’ll find a handy FAQ section to address any questions you might have about substitutions, troubleshooting, or storage tips. If you give this recipe a whirl, I’d love to hear how it turned out! Drop a comment, leave your questions, or share your own flavor twists. Your feedback helps me refine recipes and inspire other home cooks to embark on their own chocolatey adventures. Happy making, and may every bite bring a smile!
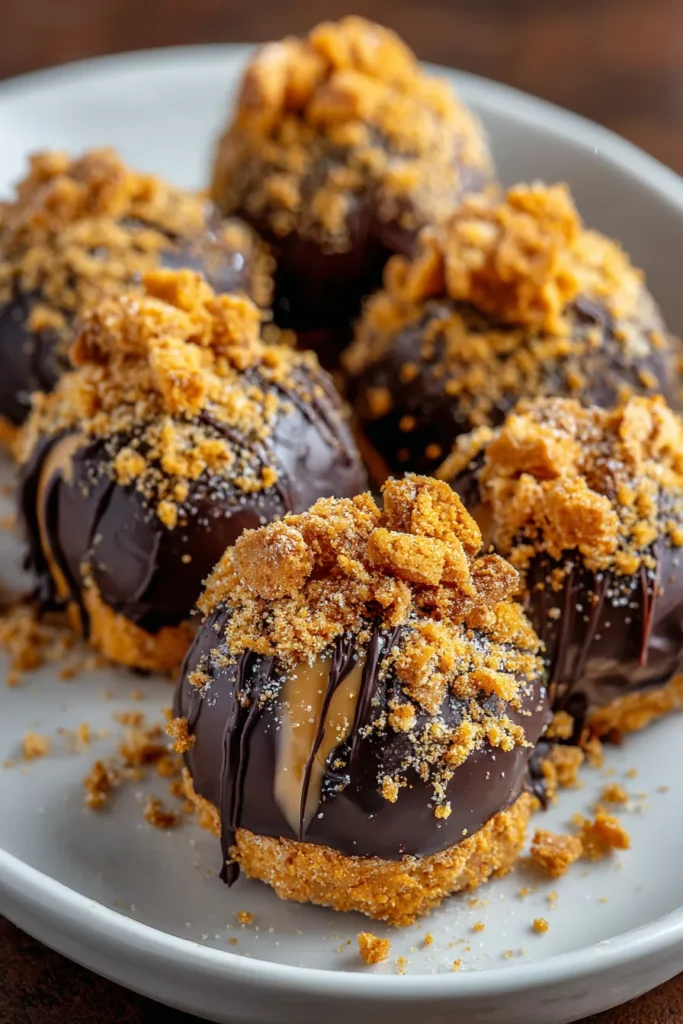

Decadent Crispy Chocolate-Dipped Butterfinger Balls
Description
These Butterfinger balls combine crunchy candy, creamy peanut butter, and rich chocolate, creating a delightful treat that’s perfect for any occasion.
Ingredients
Instructions
-
Begin by gathering all your ingredients and utensils. You will need a mixing bowl, a baking sheet lined with parchment paper, and a microwave-safe bowl for melting chocolate.
-
In a mixing bowl, combine the crushed Butterfinger candy bars, creamy peanut butter, powdered sugar, and vanilla extract. Mix everything together until well combined. The mixture should be thick and easy to mold with your hands.
-
Once the mixture is combined, use your hands to form small balls, about 1 inch in diameter. Place the formed balls onto the lined baking sheet, keeping them spaced evenly apart.
-
Once all of the Butterfinger balls are shaped, place the baking sheet in the freezer for about 30 minutes. This will help them firm up and make chocolate dipping easier.
-
While the Butterfinger balls are chilling, prepare the chocolate coating. In a microwave-safe bowl, combine the milk chocolate chips and coconut oil. Microwave in 30-second intervals, stirring in between, until the chocolate is fully melted and smooth.
-
Once the Butterfinger balls are firm, remove them from the freezer. Dip each ball into the melted chocolate, ensuring they are fully coated. Use a fork to lift them out and let any excess chocolate drip off.
-
Place the chocolate-dipped Butterfinger balls back onto the parchment-lined baking sheet. If desired, you can sprinkle some crushed Butterfinger or sea salt on top for added flavor and decoration before the chocolate sets.
-
Allow the chocolate to harden at room temperature, or you can place them back in the refrigerator to speed up the process. Once set, serve them at room temperature, or store them in an airtight container in the refrigerator until ready to enjoy.
Note
- These Butterfinger balls are a great treat for parties or holiday gatherings.
- Feel free to experiment with different types of chocolate, such as dark or white chocolate, for coating.
- You can also try adding a pinch of salt to the chocolate mixture for a sweet and salty flavor contrast.
- These treats can be made ahead of time and stored in the fridge for up to a week, making them perfect for meal prep!
- Make sure to check for allergies if you're sharing these with others, as they contain peanut butter.

