

Crunchy Coconut Chicken delivers golden chicken strips encrusted in toasted coconut and panko breadcrumbs, creating an irresistible crunch with a hint of tropical warmth. Each bite crackles with a crispy exterior and juicy interior, and pairing these strips with sweet chili sauce or mango chutney really brings out that island vibe. Whether you’re hosting a dinner party or whipping up a fun weeknight meal, this recipe promises to transport you straight to a sandy beach – no passport required!
Key Ingredients
To make these crunchy delights, you’ll need a handful of simple ingredients that work together for texture, flavor, and that signature tropical flair.
- 500 g chicken breasts: the juicy protein base that holds the crunchy coating and stays tender inside.
- 100 g desiccated coconut: sweet, nutty flakes that toast up golden to give each bite a tropical twist.
- 100 g panko breadcrumbs: light, airy crumbs that create the extra crunch coconut can’t achieve on its own.
- 50 g all-purpose flour: helps the eggs cling to the chicken strips for an even coating.
- 2 large eggs: bind the coconut and panko mixture to the chicken and lock in moisture.
- 1 tsp salt: seasons the meat right from the start for balanced flavor.
- 1/2 tsp black pepper: adds a touch of warmth and subtle spice to every bite.
- 1 tsp paprika: brings a mild smokiness and beautiful color to the golden crust.
- 1 tsp garlic powder: infuses a savory depth that complements the sweet coconut.
- 500 ml vegetable oil: the frying medium that crisps up the coating evenly at the perfect temperature.
How To Make Crunchy Coconut Chicken
Getting these chicken strips from raw to golden perfection is all about a simple assembly line and trusty frying technique. You’ll set up three dredging stations—flour, eggs, and the coconut-panko mix—season the strips, then let the oil do its magic. Follow each step, maintain consistent oil temperature, and you’ll have restaurant-quality crunch in no time. Here’s how to bring it all together:
1. Cut chicken breasts into even strips and pat dry with paper towels to remove excess moisture and ensure the coating sticks.
2. Season each strip with salt, black pepper, paprika, and garlic powder, rubbing the spices evenly over the surface.
3. Place flour in one bowl, beat eggs in a second bowl, and combine desiccated coconut with panko breadcrumbs in a third bowl.
4. Dredge each chicken strip in the flour, shaking off the excess, then dip into beaten eggs and press into the coconut-panko mixture until fully coated.
5. Heat vegetable oil in a deep skillet or pot over medium heat until it reaches about 175°C, using a thermometer for accuracy.
6. Fry the coated chicken strips in batches for 3 to 4 minutes per side, flipping once, until they’re golden brown and cooked through.
7. Remove the chicken with a slotted spoon and drain on paper towels to remove excess oil before serving.
Serving Suggestions
Crunchy Coconut Chicken is a star on its own, but elevating it with the right sides and sauces can turn it into an unforgettable meal. Whether you’re aiming for tropical vibes, balancing flavors, or adding fresh textures, these serving suggestions have you covered. From vibrant salsas to creamy dips, each idea enhances the coconut-panko crunch and juicy chicken inside. Try one or mix and match to find your favorite pairing!
- Sweet Chili Sauce: Balance the savory crunch with a sticky, slightly spicy dip—just drizzle or serve in a small bowl for dunking.
- Mango Chutney: Enhance the tropical theme by pairing with a sweet-tart chutney that brings fresh fruitiness to every bite.
- Creamy Coleslaw: Serve alongside a crisp slaw dressed in a tangy vinaigrette for a cool contrast to the warm, crunchy chicken.
- Lime Wedges: A squeeze of fresh lime juice adds bright acidity and cuts through the richness, making each slice pop.
Tips For Perfect Crunchy Coconut Chicken
Perfecting Crunchy Coconut Chicken is all about nailing the coating, getting the oil just right, and knowing how to reuse any leftovers for maximum crispiness. Over the years, I’ve learned that a few simple tweaks can take this dish from delicious to unforgettable. Here are my top insider tips to keep your chicken strips golden, tender, and full of tropical flair every time you cook.
- Substitute panko breadcrumbs with regular breadcrumbs for a different texture that’s slightly denser.
- Ensure oil temperature remains consistent at around 175°C to prevent a greasy coating and achieve even browning.
- Reheat leftover chicken in the oven at 180°C for 5 minutes on a wire rack to maintain crispiness without drying out.
- Serve with sweet chili sauce or mango chutney to highlight the tropical twist and add a burst of flavor.
How To Store It
Storing Crunchy Coconut Chicken properly ensures you can enjoy that flaky, golden crunch even after day one. Whether you’re meal-prepping or saving leftovers, keep these chicken strips crisp and flavorful with the right methods. Cooling them completely before packing and choosing the ideal container will make all the difference when it’s time to reheat. Follow these simple tips to preserve texture and taste until you’re ready for round two of island-inspired snacking.
- Refrigeration: Place cooled chicken strips in an airtight container and store in the fridge for up to 2 days.
- Reheating: Warm the strips in a preheated oven at 180°C for about 5 minutes to restore the crunch without overcooking.
- Room Temperature Prep: Let the chicken cool to room temperature before sealing to avoid condensation that softens the coating.
Frequently Asked Questions
Got questions? I’ve rounded up the most common queries about Crunchy Coconut Chicken so you can fry with confidence.
- Q: How long does it take to prepare and cook this Crunchy Coconut Chicken?
A: It takes about 30 to 35 minutes in total. This includes roughly 10 to 15 minutes for cutting and seasoning the chicken strips, 5 minutes for setting up your dredging stations, and about 10 to 15 minutes of frying time in batches until each strip is golden brown and cooked through.
- Q: How can I ensure the coconut-panko coating adheres well to the chicken?
A: Patting the chicken strips dry with paper towels before seasoning removes excess moisture, which helps the flour stick. After dredging in flour, dip the strips fully into beaten eggs, then press them gently but firmly into the coconut-panko mixture on all sides. Let the coated strips rest on a rack for a minute before frying to help the coating adhere even better.
- Q: What can I use if I don’t have desiccated coconut on hand?
A: If desiccated coconut isn’t available, you can grate fresh coconut flesh finely and then dry it briefly in a low oven (around 100°C) for 5 to 7 minutes, checking frequently to prevent browning. Alternatively, a finely chopped mixture of unsweetened shredded coconut and a small amount of coconut flour can mimic the texture quite well.
- Q: How do I maintain the correct oil temperature for frying?
A: Use a deep-fry or candy thermometer to keep your oil around 175°C. If it drops below this, the coating will absorb more oil and become greasy; if it exceeds 180°C, the outside may brown too quickly before the chicken cooks through. Adjust the heat under your skillet or pot as needed between batches to keep the temperature steady.
- Q: Can I prepare the chicken strips ahead of time?
A: Yes. You can season, flour, egg-dip, and coat the chicken strips, then arrange them in a single layer on a tray. Cover tightly with plastic wrap and refrigerate for up to 2 hours before frying. This helps streamline frying when you’re ready to cook.
- Q: How should I store and reheat leftover chicken to keep it crispy?
A: Store any leftovers in an airtight container in the refrigerator for up to 2 days. To reheat, place the chicken strips on a baking sheet and warm in a preheated oven at 180°C for about 5 minutes. This method restores crispiness without overcooking the chicken.
- Q: What dipping sauces or sides pair well with Crunchy Coconut Chicken?
A: Sweet chili sauce and mango chutney both complement the tropical coconut flavor beautifully. You can also serve it with a tangy lime-yogurt dip, pineapple salsa, or a simple side of coleslaw to add freshness and balance the richness of the fried coating.
- Q: How do I know the chicken strips are fully cooked before serving?
A: After frying for 3 to 4 minutes per side, use a meat thermometer inserted into the thickest part of a strip; it should read at least 74°C. If you don’t have a thermometer, slice one strip open to ensure the meat is opaque and the juices run clear, with no pink center.
What Makes This Special
Crunchy Coconut Chicken works because it brilliantly marries the light, sweet crunch of coconut with the airy crisp of panko, creating a golden crust that seals in juicy chicken every time. It’s a playful twist on traditional fried chicken that brings sunny, tropical vibes straight to your plate. Plus, it’s straightforward enough for a weeknight dinner yet impressive for guests. Feel free to print this recipe and save it for all your future gatherings or cozy meals. Drop a comment below if you try it, have questions, or invent your own dipping sauces—I’d love to hear your tweaks!
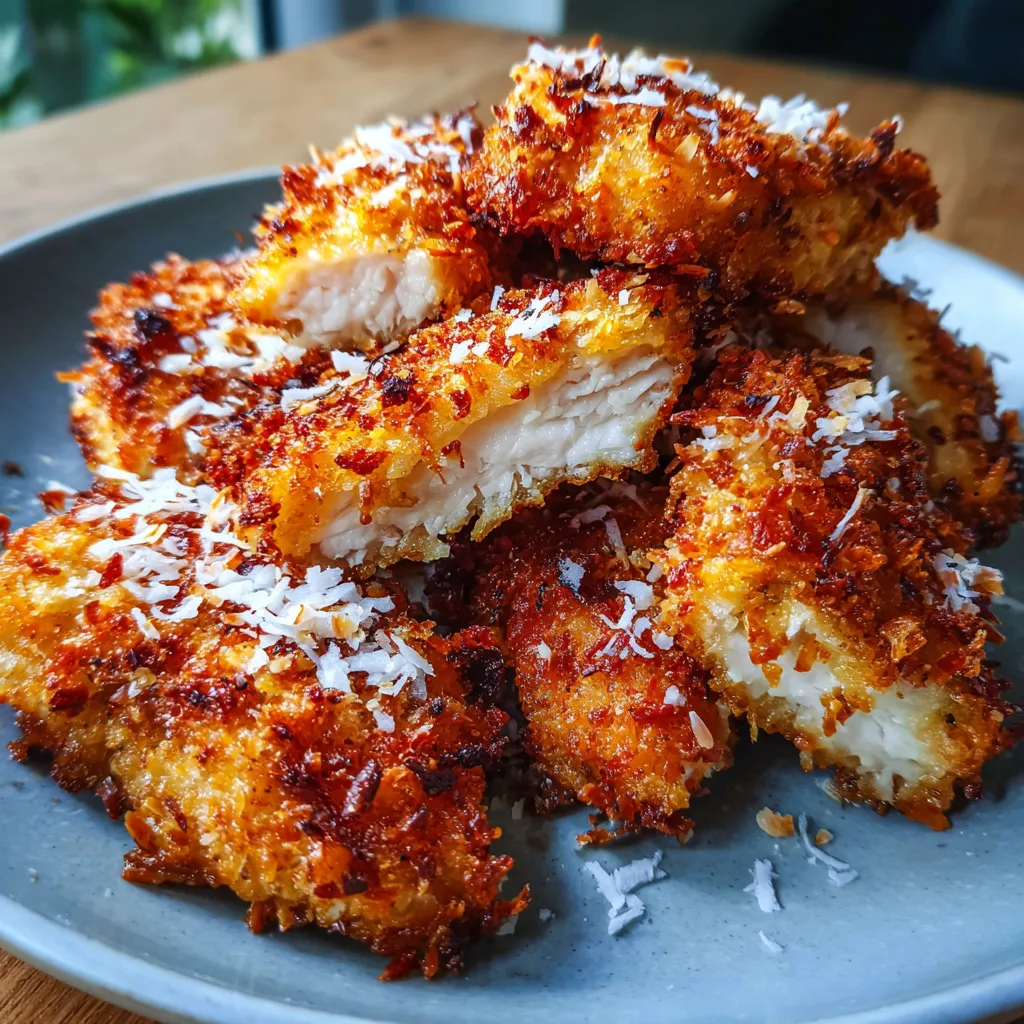

Crunchy Coconut Chicken
Description
Crunchy chicken strips coated in toasted coconut and panko breadcrumbs, fried to golden perfection. Each bite crackles with a crispy exterior and juicy interior, and a tropical hint shines through when paired with sweet chili sauce.
Ingredients
Instructions
-
Cut chicken breasts into even strips and pat dry with paper towels.
-
Season chicken strips with salt, black pepper, paprika, and garlic powder.
-
Place flour in one bowl, beat eggs in a second bowl, and combine desiccated coconut with panko breadcrumbs in a third bowl.
-
Dredge each chicken strip in flour, then dip into beaten eggs and coat with the coconut breadcrumb mixture, pressing gently to adhere.
-
Heat vegetable oil in a deep skillet or pot over medium heat until it reaches about 175°C.
-
Fry coated chicken strips in batches for 3 to 4 minutes per side until golden brown and cooked through.
-
Remove chicken and drain on paper towels to remove excess oil before serving.
Note
- You can substitute panko breadcrumbs with regular breadcrumbs for a different texture
- Ensure oil temperature remains consistent to prevent greasy coating
- Reheat leftover chicken in the oven at 180°C for 5 minutes to maintain crispiness
- Serve with sweet chili sauce or mango chutney for a tropical twist

