

Crispy Chicken Romano delivers that irresistible golden crunch you’ve been craving, with tender chicken breasts coated in cheesy breadcrumbs and a hint of garlic. This dinner favorite combines pan-frying and quick baking to lock in juiciness while achieving restaurant-quality crispiness. Get ready for crunchy bites that give way to moist, flavorful chicken—perfect for weeknight meals or impressing guests with minimal fuss!
Key Ingredients
Before you dive in, let’s take a look at the stars of Crispy Chicken Romano. Each component plays a crucial role in creating that perfect crunch, subtle garlic aroma, and mouthwatering cheesy finish.
- 4 pieces boneless skinless chicken breast: The lean, tender protein base that soaks up all the savory coating.
- 1/2 cup all-purpose flour: Helps the egg wash adhere evenly for a consistent crust.
- 2 eggs: Binds the flour to the cheese-breadcrumb mix, ensuring every bite is crispy.
- 1 cup grated Romano cheese: Imparts tangy, salty flavor and helps the breadcrumbs crisp to a golden hue.
- 1 cup breadcrumbs: Adds the essential crunch and volume to the coating.
- 1 teaspoon garlic powder: Infuses every bite with a warm, aromatic garlic note.
- 1/2 teaspoon salt: Seasons the chicken and balancing all the flavors.
- 1/4 teaspoon black pepper: Provides a subtle kick and depth to the crust.
- 3 tablespoons olive oil: Used for pan-frying, giving the crust its initial golden sear.
How To Make Crispy Chicken Romano
Ready to transform simple ingredients into a crispy, cheesy masterpiece? Follow these steps closely to nail both the pan-fry and oven-bake stages, ensuring your chicken turns out perfectly golden on the outside and juicy inside.
1. Preheat the oven to 400°F (200°C) and lightly oil a baking sheet to prevent sticking and ensure even browning.
2. In a shallow bowl, combine flour, garlic powder, salt, and black pepper, whisking to distribute the seasonings evenly.
3. In a second bowl, beat the eggs until smooth and slightly frothy—this helps the coating cling better.
4. In a third bowl, mix the Romano cheese and breadcrumbs thoroughly, breaking up any clumps for a uniform crust.
5. Dredge each chicken breast in the flour mixture, shaking off any excess to avoid a gummy coating.
6. Dip the floured chicken into the beaten eggs, making sure every surface is coated.
7. Press the egg-coated chicken into the cheese and breadcrumb mixture, applying firm pressure until fully covered.
8. Heat olive oil in a large skillet over medium-high heat until it shimmers—but doesn’t smoke.
9. Add the chicken breasts and fry for 2–3 minutes per side, flipping once to achieve a deep golden sear.
10. Transfer the fried chicken to the prepared baking sheet, spacing them evenly, then bake for 10–12 minutes until cooked through.
11. Remove from the oven and let the chicken rest for 5 minutes before serving, allowing the juices to redistribute.
Serving Suggestions
Whether you’re hosting a casual dinner or a festive gathering, these serving ideas will highlight every crispy, cheesy note of your Crispy Chicken Romano:
- Classic Marinara Dip: Serve with a warm bowl of marinara sauce for a comforting, Italian-inspired combo.
- Fresh Lemon Wedges: A quick squeeze of lemon juice brightens the rich cheese coating.
- Garden Salad Side: Pair with a crisp salad of mixed greens, cherry tomatoes, and a light vinaigrette to balance the richness.
- Herb-Tossed Pasta: Toss spaghetti in olive oil, garlic, and chopped parsley for a simple yet elegant side dish.
Tips For Perfect Crispy Chicken Romano
Mastering this recipe is all about technique and timing. Here are some friendly tips to ensure your chicken emerges golden and juicy every time:
- For a lighter version bake the coated chicken at 425°F (220°C) for 15–18 minutes instead of pan frying.
- You can substitute Parmesan cheese if Romano is unavailable—expect a slightly milder flavor profile.
- Leftover chicken stores well in an airtight container in the refrigerator for up to 3 days.
- Serve with a squeeze of lemon or marinara sauce for added brightness and moisture.
How To Store It
Keeping your Crispy Chicken Romano fresh and crispy is easier than you think. Whether you’re prepping ahead or saving leftovers, follow these storage methods:
- Refrigerate: Place cooled chicken in an airtight container for up to 3 days. This preserves moisture without sogginess.
- Freeze: Wrap portions individually in foil or freezer-safe bags for up to 1 month; thaw overnight in the fridge.
- Reheat: Preheat oven to 375°F (190°C) and bake for 8–10 minutes to restore crispiness without drying out the meat.
- Avoid stacking: For best results, arrange chicken in a single layer to maintain the crunchy crust during storage and reheating.
Frequently Asked Questions
Here are answers to the most common questions about Crispy Chicken Romano:
- How long does it take to prepare this recipe?
It takes about 35 minutes total: 15 minutes for mixing ingredients and coating the chicken, 5–6 minutes for pan frying, 10–12 minutes for oven baking at 400°F (200°C), and a 5-minute rest before serving.
- Can I substitute Parmesan cheese for Romano?
Yes. Simply replace the Romano with an equal amount of grated Parmesan. The flavor will be slightly milder, but you’ll still achieve a crispy, golden crust.
- How can I ensure the coating stays crispy?
Shake off excess flour before dipping in egg, press the cheese and breadcrumb mixture firmly onto the chicken, heat the olive oil until it shimmers, avoid overcrowding the skillet, and serve immediately after baking and resting.
- How do I know when the chicken is fully cooked?
The internal temperature should reach 165°F (74°C) when checked with a meat thermometer. You can also slice into the thickest part to ensure there’s no pink and the juices run clear. If it’s underdone, return to the oven for a few more minutes.
- What’s the lighter baking-only method?
Skip pan frying and bake the coated chicken at 425°F (220°C) on a lightly oiled sheet for 15–18 minutes, flipping once halfway through, until golden brown and cooked through.
- Can I prepare components in advance and how should I store leftovers?
You can dredge and coat the chicken up to 2 hours ahead; keep it covered in the fridge. Cooked chicken stores well in an airtight container for up to 3 days. To reheat, bake at 375°F (190°C) for 8–10 minutes to restore crispiness.
- What serving suggestions complement Crispy Chicken Romano?
Serve with a squeeze of fresh lemon or warm marinara sauce, alongside a crisp green salad, roasted vegetables, or a simple pasta tossed with olive oil and herbs.
What Makes This Special
Crispy Chicken Romano shines thanks to its perfect balance of cheesy crunch and juicy chicken, plus that hint of garlic that keeps everyone coming back for just one more bite. It’s a simple recipe that packs a restaurant-quality punch, whether you’re cooking for family, friends, or yourself. Don’t forget to print this article and save it for your next cozy dinner night. Have questions, tweaks, or a success story to share? Drop a comment below – I’d love to hear how your Crispy Chicken Romano turns out!
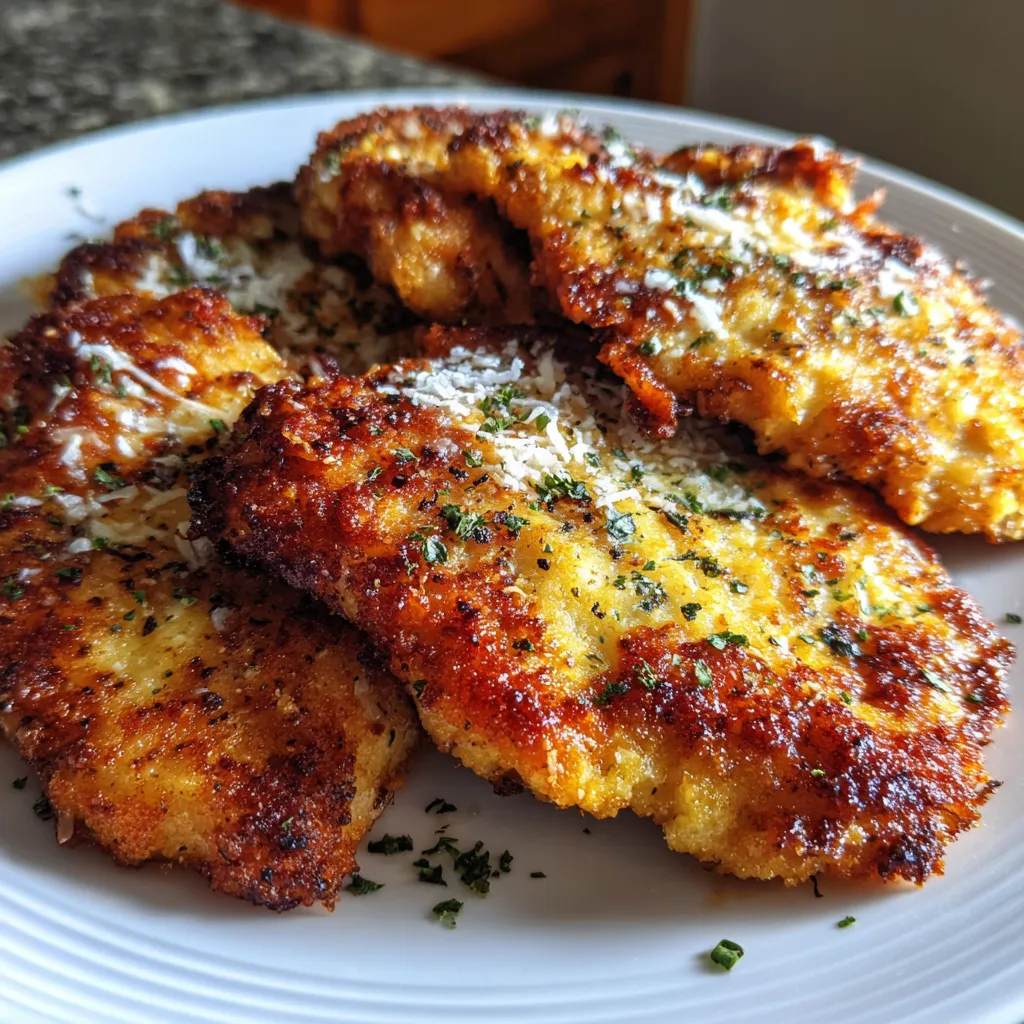

Crispy Chicken Romano
Description
Experience crunchy bites of golden breading giving way to moist, seasoned chicken. Romano cheese and garlic powder add tangy, aromatic notes. Pan-fried then oven-baked for effortless, restaurant-quality crispiness.
Ingredients
Instructions
-
Preheat the oven to 400°F (200°C) and lightly oil a baking sheet.
-
In a shallow bowl combine flour, garlic powder, salt, and black pepper.
-
In a second bowl beat the eggs until smooth.
-
In a third bowl mix the Romano cheese and breadcrumbs.
-
Dredge each chicken breast in the flour mixture, shaking off excess.
-
Dip the floured chicken into the beaten eggs, coating evenly.
-
Press the egg-coated chicken into the cheese and breadcrumb mixture until fully covered.
-
Heat olive oil in a large skillet over medium-high heat.
-
Add the chicken breasts and fry for 2–3 minutes per side until golden brown.
-
Transfer the fried chicken to the prepared baking sheet and bake for 10–12 minutes until cooked through.
-
Remove from the oven and let the chicken rest for 5 minutes before serving.
Note
- For a lighter version bake the coated chicken at 425°F (220°C) for 15–18 minutes instead of pan frying.
- You can substitute Parmesan cheese if Romano is unavailable.
- Leftover chicken stores well in an airtight container in the refrigerator for up to 3 days.
- Serve with a squeeze of lemon or marinara sauce for added flavor.

