

Crisp apples nestled in a tender, buttery oat crust—these apple crisp bars bring together the best of fall baking in one handheld treat. Every bite delivers a satisfying crunch from the golden crumb topping, followed by pockets of sweet-tart apple filling that practically melt in your mouth. Whether you’re winding down after a busy day or looking for a crowd-pleasing dessert at your next gathering, these bars hit that cozy, comfort-food spot like nothing else. With just a handful of pantry staples and seasonal apples, you’ll have a tray of sweet snack-ready bars on the table in under an hour of active baking time.
I first stumbled upon this recipe when I was craving the flavors of a classic apple crisp but needed something easier to serve at a potluck. What started as a quick tweak turned into a permanent fixture in my recipe box—especially since it’s incredibly forgiving for beginner bakers. This dessert bars recipe, rated “Beginner” difficulty, has a prep time of about 15 minutes, a cook time of 45 minutes, and a brief 15-minute rest before slicing. At roughly 250 calories per bar (when cut into 16 portions), it’s easy to indulge without going overboard. Savor the perfect blend of sweet and crunchy with these Buttery Apple Crisp Bars—your fall baking game just got seriously upgraded!
KEY INGREDIENTS IN BUTTERY APPLE CRISP BARS
Before you dive into the kitchen, let’s take a closer look at the building blocks of these irresistible bars. Each ingredient plays a vital role in creating that perfect balance of tender apple filling and a satisfyingly crumbly topping.
- All-Purpose Flour
This pantry staple forms the backbone of both the crust and the filling’s thickening agent. It binds the oats and sugar together, giving structure to the bars and helping the apple juices become luxuriously syrupy.
- Old-Fashioned Oats
These hearty oats add a nutty flavor and chewy texture to the crumb topping. They soak up melted butter and brown sugar, transforming into golden, crisp clusters as they bake.
- Light Brown Sugar
With its hint of molasses, brown sugar brings a gentle caramel note to the crumbs and helps them brown beautifully. It also sweetens the crust and harmonizes with the apples’ natural tartness.
- Unsalted Butter (Melted)
Butter is where the magic happens: it creates a rich, tender base and crisp topping. Melting it ensures easy mixing with dry ingredients, coating each oat flake for even browning.
- Baking Soda
A small pinch helps the crust rise ever so slightly and prevents it from becoming too dense, creating a lightness that contrasts nicely with the juicy filling.
- Salt
Even in desserts, salt is essential. It enhances the flavors of the apples and brown sugar while balancing the sweetness in every crumb.
- Ground Cinnamon
Warming and fragrant, cinnamon is the signature spice of this recipe. It’s stirred into both the crust and the filling, providing cozy, fall-inspired flavor throughout.
- Apples (Peeled, Cored, Thinly Sliced)
Choose firm varieties like Granny Smith or Honeycrisp for the perfect balance of tartness and sweetness. The apple slices soften during baking, releasing juices that meld with the crumb topping.
- Granulated Sugar
Sprinkled over the apples, it helps draw out moisture and caramelizes during baking, creating pockets of sweet apple filling.
- All-Purpose Flour (for Filling)
Just a touch of flour tossed with the apples thickens the juices, ensuring a luscious filling that doesn’t run off the bars when cut.
- Nutmeg
A subtle complement to cinnamon, nutmeg brings a warm, earthy note that deepens the spiced flavor profile of the apple layer.
- Lemon Juice
A splash of brightness that prevents the apple slices from browning and adds a refreshing zing to balance the sweetness.
HOW TO MAKE BUTTERY APPLE CRISP BARS
With your ingredients prepped, this recipe comes together easily by layering a crumbly base, a flavorful apple filling, and a golden topping. Follow these steps to achieve perfectly baked bars every time!
1. Preheat the oven to 350°F (175°C). Grease and line an 8×8-inch square baking pan with parchment paper, leaving a 2-inch overhang on each side for easy removal. The parchment sling makes lifting the bars out a breeze once they’ve cooled.
2. In a medium bowl, combine the all-purpose flour, old-fashioned oats, light brown sugar, melted butter, baking soda, salt, and ground cinnamon. Mix well—use a spatula or clean hands—to create a uniform, crumbly mixture where each oat flake is coated in buttery sweetness.
3. Reserve one cup of this crumb mixture for the topping. With the remaining mixture, press firmly into the bottom of the prepared pan to form an even crust. A flat-bottomed measuring cup or glass helps achieve a smooth, compact layer.
4. For the apple filling, toss together the thinly sliced apples, granulated sugar, all-purpose flour, ground cinnamon, nutmeg, and lemon juice in a separate bowl. Ensure each slice is well coated so the flavors distribute evenly.
5. Spread the apple mixture in an even layer over the crust, taking care to distribute the slices so every bar gets a good balance of fruit.
6. Sprinkle the reserved crumb topping over the apples, gently pressing it down in a few spots. This helps the crumbs adhere during baking and creates a nicely unified topping.
7. Bake in the preheated oven for 40–45 minutes, or until the top turns golden brown and you can pierce the apples easily with a fork. Rotating the pan halfway through ensures even baking.
8. Remove from the oven and let the bars cool in the pan for about 15 minutes. This rest period lets the filling set slightly, making cutting cleaner.
9. Using the parchment paper overhang, carefully lift the entire block of bars from the pan and transfer it to a wire rack to cool completely.
10. Cut into 16 bars and serve warm or at room temperature. Enjoy them plain or top each square with a scoop of vanilla ice cream for an extra-special treat.
SERVING SUGGESTIONS FOR BUTTERY APPLE CRISP BARS
When it comes to serving these Buttery Apple Crisp Bars, the possibilities are just as appealing as the bars themselves. Whether you’re aiming for an elegant dessert presentation or a casual coffee-hour snack, small touches can elevate each bite. Here are four delightful ways to plate and enhance your bars without much extra fuss.
- Serve each bar warm with a scoop of vanilla ice cream perched on top. The contrast between the hot, crisp crumbs and the cold, creamy ice cream creates a blissful melding of textures and temperatures.
- Drizzle a ribbon of homemade caramel sauce over the bars for a decadent caramel-apple twist. Warm the sauce slightly so it’s pourable, then zigzag it across each square just before serving.
- Pair a bar with a steaming cup of freshly brewed coffee or spiced chai tea for a cozy afternoon pick-me-up. The spiced notes in the chai perfectly echo the cinnamon and nutmeg in the bars.
- Dust lightly with powdered sugar right before serving and garnish with a sprig of fresh mint or a thin apple fan on the side. This simple finishing touch adds a bit of visual flair for entertaining.
HOW TO STORE BUTTERY APPLE CRISP BARS
Proper storage ensures that these bars stay as fresh and flavorful as the day they came out of the oven. Whether you’re saving leftovers for midweek treats or prepping ahead for a big gathering, here are a few reliable methods to keep your bars tasting just right.
- Room Temperature Storage: Once completely cooled, place the bars in a single layer inside an airtight container. You can separate layers with parchment paper to prevent sticking. Stored this way, bars stay fresh for up to 2 days, with the crumb topping maintaining its crunch.
- Refrigeration: For longer shelf life—up to 4 days—store the bars in an airtight container in the fridge. Chilling slightly firms up the filling, making the bars easier to slice. Bring them back to room temperature or warm briefly in the microwave before serving.
- Freezing: To freeze, wrap individual bars tightly in plastic wrap and place them inside a freezer-safe bag. They’ll keep well for up to 3 months. When you’re ready to enjoy, thaw at room temperature or reheat in a low oven until warmed through.
- Reheating Tips: For a bakery-fresh finish, warm bars in a preheated 325°F (163°C) oven for 5–8 minutes or microwave a single serving for about 15 seconds. This revives the crisp topping and releases those irresistible aromatic spices.
CONCLUSION
Wrapping up this sweet journey through Buttery Apple Crisp Bars, we’ve covered everything from key ingredients to foolproof baking steps, plus creative serving and storage tips. These bars strike the perfect harmony between crisp, buttery crumbs and tender, spiced apple filling—making them a standout dessert or afternoon snack. With just 15 minutes of prep and beginner-friendly techniques, this recipe is designed for home cooks of all skill levels. You’ll find that the ease of assembly and forgiving nature of the crumb mixture make it an ideal go-to when you want something homemade yet hassle-free. Plus, at only about 250 calories per bar (when divided into 16 pieces), it’s easier to share and savor without overindulging.
Feel free to print this article or save it to your favorite recipe folder for next time you’re in the mood for fall baking or a sweet snack. You’ll also find a handy FAQ section below to address any questions or troubleshoot common baking concerns. If you give these bars a try, I’d love to hear how they turned out! Drop a comment with your favorite apple variety, any tweaks you made, or just to say hi. And if you run into any recipe roadblocks, don’t hesitate to ask for guidance—I’m here to help every step of the way. Happy baking!
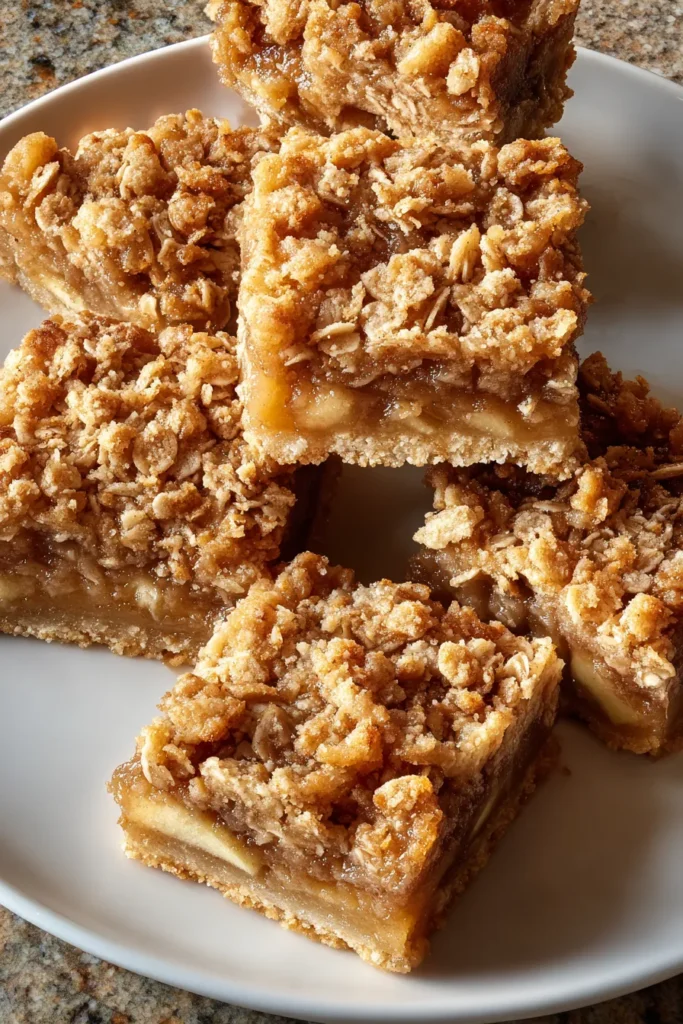

Buttery Apple Crisp Bars
Description
These buttery apple crisp bars are a delightful mix of tender apples and crunchy oats, all topped with a golden crumb. Perfect for dessert or a sweet snack!
Ingredients
Instructions
-
Preheat the oven to 350°F (175°C). Grease and line an 8x8-inch square baking pan with parchment paper, leaving an overhang on each side.
-
In a medium bowl, combine flour, oats, brown sugar, melted butter, baking soda, salt, and cinnamon. Mix well until the mixture is crumbly.
-
Reserve 1 cup of this mixture for topping. Press the remaining mixture firmly into the bottom of the prepared baking pan to form a crust.
-
To make the apple filling, in another bowl, toss together the sliced apples, granulated sugar, flour, cinnamon, nutmeg, and lemon juice. Mix until apples are well coated.
-
Spread the apple mixture evenly over the crust in the pan.
-
Sprinkle the reserved crumb mixture evenly over the apples, pressing it slightly.
-
Bake in the preheated oven for 40-45 minutes or until the top is golden brown and the apples are tender.
-
Remove from the oven and let it cool in the pan for about 15 minutes.
-
Use the parchment paper overhang to lift the bars from the pan and transfer to a wire rack to cool completely.
-
Cut into bars and serve. They are delicious on their own or with a scoop of vanilla ice cream.
Note
- These bars can be made ahead and stored in an airtight container for up to 3 days.
- You can use different apple varieties for a mix of flavors and textures.
- For added crunch, consider mixing chopped nuts into the crumb topping before baking.
- The recipe can easily be doubled and baked in a 9x13-inch pan for more servings.

