

Brown Butter Brookies are the ultimate harmony between chewy chocolate chip cookie goodness and rich, fudgy brownie decadence. From the very first swirl of butter in the pan, you’re greeted with that magical sizzle, followed by a golden-brown hue that promises layers of flavor. When that butter foams and transforms into something reminiscent of toasted nuts, you know you’re onto something extraordinary. Tip one: take your time browning the butter. Each crackle and bubble is nature’s way of layering in a warm, toasty essence that will have taste buds cheering. By the time you stir in your sugars, eggs, and vanilla, the whole kitchen feels like a cozy fall afternoon, even if it’s the middle of summer. These brookies get their best personality from that humble starting point, where simple ingredients become something showstopping. Trust me, once you dig into that first square, you’ll find yourself reaching for another before you even realize it. Every bite delivers that comforting balance of sweet, salty, and buttery nirvana.
I love that these brookies are the best of both worlds — perfect for indecisive dessert lovers. Last weekend, I brought a tray to my book club, and everyone was divided between cookie lovers and brownie fanatics. Within minutes, all arguments melted away as we passed around paper plates loaded with warm, gooey squares. The edges had that classic chewy snap, while the center stayed delightfully gooey. And let’s not forget the extra sprinkle of chocolate chips on top: total showstopper. Plus, the whole process felt like a mini science experiment. Watching the butter brown, mixing dough into two distinct batters, and layering them so the cookie base meets the brownie top…it’s creative, therapeutic, and satisfying. Whether you’re an experienced baker looking for a fun challenge or a home cook wanting to impress friends, these Brown Butter Brookies will earn you instant dessert royalty. Every bite is a reminder that sometimes, the simplest changes – like browning butter – can transform a recipe into something truly unforgettable.
KEY INGREDIENTS IN BROWN BUTTER BROOKIES
Before we dive into the step-by-step, let’s explore the magic behind each component of these brookies. Every ingredient contributes flavor, texture, or structure, so understanding their roles can help you customize or troubleshoot as you go.
- Unsalted butter
Browning the butter deepens its flavor, adding a toasty, nutty richness that elevates both the cookie and brownie layers.
- Granulated sugar
Creates sweetness and helps achieve a slightly crisp edge in the cookie portion, balancing the fudginess of the brownie.
- Brown sugar
Adds moisture and a subtle molasses undertone, ensuring the cookie layer stays chewy and tender.
- Large eggs
Bind the dough, provide lift, and contribute to that tender crumb in both the cookie and brownie sections.
- Vanilla extract
Enhances the overall flavor, bringing warmth and depth while rounding out the sweetness.
- All-purpose flour
The backbone of the brookies, delivering structure so that the base holds up under the brownie batter.
- Baking soda
Leavens the cookie layer just enough for a soft, chewy texture without overpowering the brownie’s density.
- Salt
Balances sweetness and intensifies the chocolate flavors, making every bite more complex.
- Semi-sweet chocolate chips
Folded into the cookie batter, these chips offer bursts of melty chocolate in every bite.
- Cocoa powder
Key to the brownie layer, cocoa powder provides intense chocolate flavor and a fudgy consistency.
- Milk
Moistens the brownie batter, creating a silky texture and helping the cocoa bloom for deeper color and taste.
- Additional chocolate chips for topping (optional)
A finishing flourish for extra chocolatey appeal and a decorative touch that begs you to dig in.
HOW TO MAKE BROWN BUTTER BROOKIES
Now that you’ve gathered your ingredients, let’s walk through the process of transforming them into a two-in-one dessert masterpiece. Follow these steps to achieve perfectly layered, deeply flavored brookies.
1. Preheat your oven to 350°F (175°C). Prepare a 9×13-inch baking pan by lining it with parchment paper or lightly greasing it so the brookies lift out easily after baking.
2. In a medium saucepan over medium heat, melt the butter. Stir continuously with a heat-proof spatula until it foams, then watch carefully as it turns a deep golden brown and fills the air with a subtle nutty scent. This step takes about 5–7 minutes. Remove from heat and let it cool slightly.
3. In a large mixing bowl, whisk together the cooled brown butter, granulated sugar, and brown sugar until the mixture is smooth and uniform, with no grainy texture.
4. Add the eggs one at a time, beating well after each to ensure they’re fully incorporated. Stir in the vanilla extract, scraping down the sides of the bowl so everything is evenly distributed.
5. In a separate bowl, whisk together the flour, baking soda, and salt. Gradually fold the dry ingredients into the wet mixture, stirring gently until just combined — be careful not to overmix, or the brookies may become tough.
6. Divide the dough in half. To one half, gently fold in the semi-sweet chocolate chips. To the other half, mix in the cocoa powder and milk until you have a smooth, fudgy brownie batter.
7. Spread the chocolate chip cookie dough evenly across the bottom of the prepared pan, pressing it out with a spatula for a uniform layer.
8. Carefully dollop or pour the brownie batter over the cookie base, then use a clean spatula to smooth it out so it covers evenly without disturbing the bottom layer too much.
9. If desired, sprinkle extra chocolate chips on top for a festive look and more pockets of melty goodness.
10. Bake for 25–30 minutes, or until a toothpick inserted into the center comes out with just a few moist crumbs clinging to it. The edges should be set, but the center will remain slightly soft.
11. Let the brookies cool completely in the pan on a wire rack. Once cooled, lift them out using the parchment overhang, slice into squares, and enjoy the best of both cookie and brownie worlds!
SERVING SUGGESTIONS FOR BROWN BUTTER BROOKIES
Transforming these brookies from homemade treat to show-stopping dessert is all about presentation, temperature, and complementary flavors. Whether you’re hosting brunch, a dinner party, or a casual get-together, these suggestions will help you serve them in style. Remember, these bars are at their absolute best when they’re still slightly warm and the chocolate is soft. Pairing them thoughtfully with ice creams, sauces, and garnishes takes each bite from delightful to unforgettable.
- Serve them warm with vanilla ice cream
Place a square on a chilled dessert plate and top with a scoop of creamy vanilla bean ice cream. The contrast between the warm brookie and cold ice cream creates a dreamy, melty experience.
- Drizzle with salted caramel sauce
Warm a jar of salted caramel and gently pour a ribbon across each bar. The sweet-savory interplay elevates the chocolate flavor and adds a gourmet touch.
- Garnish with fresh berries and mint
Arrange raspberries or sliced strawberries around the edge of the plate, and tuck in a few mint leaves for a pop of color and brightness that cuts through the richness.
- Turn them into milkshake toppers
Crumble cooled brookies into chunky pieces and stir them into a chocolate or vanilla milkshake. Top with whipped cream and more crumbles for a decadent twist on dessert beverages.
HOW TO STORE BROWN BUTTER BROOKIES
Keeping your brookies fresh and fudgy means choosing the right storage method. Whether you want to have leftovers on hand for a week or freeze a portion for later, I’ve got you covered. Proper storage preserves the nutty brown butter aroma, maintains that tender crumb, and ensures the chocolate stays melty in all the right places. Follow these simple techniques to enjoy your brookies at peak deliciousness long after bake day.
- Store at room temperature
Once completely cooled, transfer brookies to an airtight container layered with parchment paper. They’ll stay soft and chewy for up to 3 days without refrigeration.
- Refrigerate for extended freshness
For up to 1 week of storage, keep the brookies in a sealed container in the fridge. Let them come to room temperature or warm briefly before serving to restore that fresh-baked feel.
- Freeze for long-term enjoyment
Wrap individual squares tightly in plastic wrap, then place them in a freezer-safe bag or container. They can be frozen for up to 3 months. Thaw at room temperature or gently microwave from frozen in 10-second intervals.
- Reheat for fresh-baked warmth
To revive the gooey center, warm a single serving in the microwave for about 10–15 seconds, or pop the bars in a preheated 300°F oven for 5 minutes. Watch closely so they don’t dry out.
CONCLUSION
Brown Butter Brookies are the kind of recipe that rewards curiosity and improvisation. From that first moment of browning butter to the final, triumphant slice of gooey, chocolate-studded goodness, this dessert is a celebration of texture, flavor, and a dash of kitchen magic. By mastering the technique of browning butter, dividing dough into cookie and brownie layers, and baking to just the right bake time, you’ll have a tray of dessert squares that impresses anyone lucky enough to get a taste. Feel free to print this article and save it for later, whether you want to bake up a solo treat or share with a crowd. You can also find a FAQ below to help with any common questions about ingredient swaps, baking times, or storage tricks.
I hope you give these brookies a try and love them as much as I do. If you have any comments, questions, or feedback—about the browning process, layering, or even how to jazz them up with your favorite mix-ins—I’d love to hear from you. Your kitchen adventures and baking successes are what make these recipes truly come alive. Happy baking!
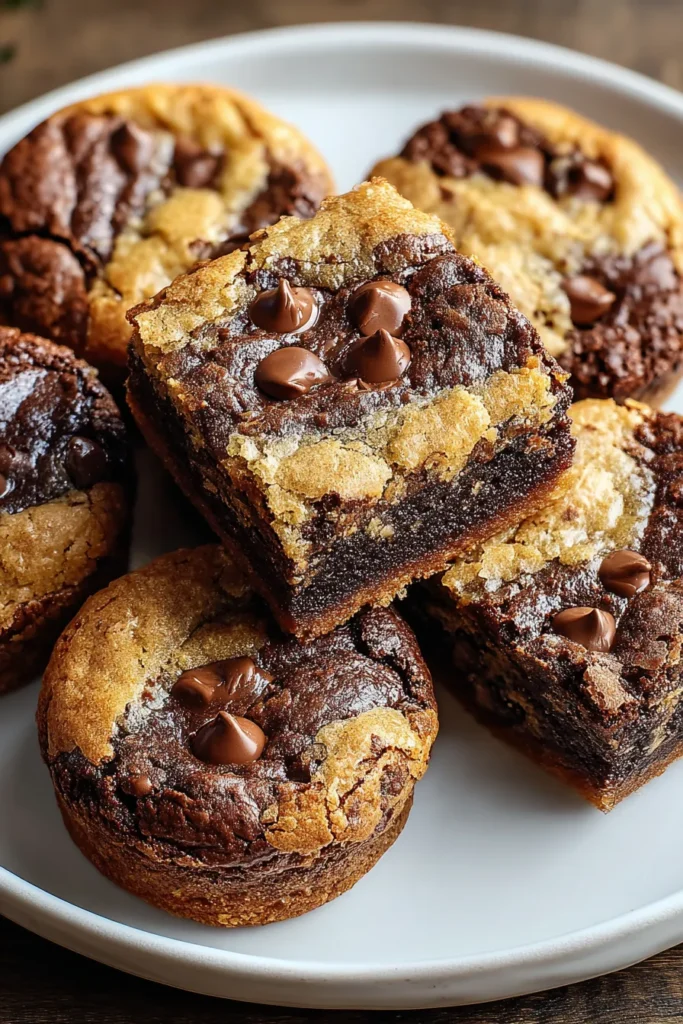

Brown Butter Brookies
Description
Sink your teeth into these decadent brookies, where chewy chocolate chip cookies meet fudgy brownie goodness, all elevated by the warm flavor of brown butter.
Ingredients
Instructions
-
Preheat your oven to 350°F (175°C). Prepare a 9x13-inch baking pan by lining it with parchment paper or greasing it lightly.
-
In a medium saucepan over medium heat, melt the butter. Stir continuously until the butter foams and then turns a golden brown color, releasing a nutty aroma. This may take about 5-7 minutes. Remove from heat and let cool for a few minutes.
-
In a large mixing bowl, combine the brown butter, granulated sugar, and brown sugar. Stir until the mixture is smooth and well combined.
-
Beat in the eggs, one at a time, followed by the vanilla extract, ensuring each is fully incorporated before adding the next.
-
In a separate bowl, mix the flour, baking soda, and salt. Gradually add the dry ingredients into the wet mixture, stirring until just combined.
-
Divide the dough in half. To one half, add the chocolate chips. To the other half, add the cocoa powder and milk, mixing until you have a soft brownie batter.
-
Spread the chocolate chip dough evenly across the bottom of the prepared baking pan.
-
Carefully layer the brownie batter on top of the chocolate chip dough, spreading it evenly. Use a spatula to smooth the top.
-
Sprinkle additional chocolate chips over the top if desired for a decorative touch and extra chocolate goodness.
-
Bake in the preheated oven for about 25-30 minutes, or until a toothpick inserted in the center comes out with just a few moist crumbs.
-
Allow the brookies to cool completely in the pan on a wire rack. Once cool, cut into squares and enjoy!
Note
- Browning the butter adds a nutty, richer flavor to the brookies, enhancing the overall taste.
- For a gooey center, bake for a shorter time; for a firmer, cake-like texture, bake a bit longer.
- Adjust the quantity of chocolate chips based on your preference for sweetness and texture.
- This recipe is perfect for those who love both cookies and brownies but can't decide which to make!

