

One of the most satisfying moments in any home kitchen is the transformation of humble cucumbers into a batch of sweet, tangy bread and butter pickles that practically glow on the shelf. This easy, beginner-friendly recipe invites you to Craft Your Own Sweet and Tangy Bread and Butter Pickles at Home! You’ll start with crisp, fresh cucumbers and vibrant onions, add a dash of green bell pepper for color and crunch, and let a blend of apple cider vinegar, granulated sugar, and warming spices work their magic. With just 1 hour of prep time, 10 minutes of cooking, and a patient 1 week of resting, these pickles will reward your effort with deep flavor and delightful texture. The process yields about 4 pint-sized jars, perfect for gifting or brightening up appetizers, lunches, and dinners. At around 120 calories per ¼-cup serving, these pickles also fit nicely into balanced eating plans, offering a burst of flavor without overindulgence.
Starting this recipe feels like sharing a secret family tradition, even if it’s your very first jar. The difficulty level: beginner means anyone with basic kitchen tools—bowls, a pot, and jars—can savor success. Whether you’re preparing a batch for a backyard barbecue, enhancing a lunchbox sandwich, or simply craving a crunchy, sweet snack straight from the jar, these homemade bread and butter pickles never disappoint. The combination of mustard seeds and celery seeds adds just a hint of spice, while turmeric, cloves, and cinnamon lend a warm golden hue and complexity. It’s a satisfying canning project with minimal fuss: slice the cucumbers, onions, and peppers, salt and rinse, then simmer everything in the sweet and tangy brine. Once your jars are cooled, tuck them into a cool, dark place for at least a week, and you’ll be rewarded with pickle perfection.
KEY INGREDIENTS IN BREAD AND BUTTER PICKLES
Before diving into the process of turning cucumbers into golden, sweet-and-sour pickles, it’s important to gather the essential components that create this classic flavor profile. Every ingredient plays a specific role, from building the brine to balancing sweetness and spice. Here’s a breakdown of the key players in this recipe:
- Cucumbers
These crisp heroes provide the crunchy base for your pickles. Opt for pickling cucumbers, which hold their firmness during the canning process and won’t become mushy once bathed in vinegar and spices.
- Onion
Thinly sliced onion brings a mild, sweet sharpness that complements the cucumbers. Its natural sugars enhance the overall sweetness, while its layers soak up brine beautifully.
- Green bell pepper
Adding color and a gentle vegetal note, green bell pepper slices also help maintain a satisfying crunch. They absorb the brine and make each bite a little more interesting.
- Kosher salt
This coarse salt draws moisture out of the vegetables during the initial soak, ensuring crispness. It also helps season the pickling mix evenly.
- Apple cider vinegar
Offering a fruity acidity, apple cider vinegar forms the backbone of the pickling brine. Its gentle tang balances the sugar and intensifies the spices’ aromas.
- Granulated sugar
Sugar sweetens the brine, creating the “bread and butter” characteristic that contrasts with the vinegar’s sharpness. It also helps preserve the pickles by lowering water activity.
- Mustard seeds
These tiny seeds pop with a peppery bite when heated in the brine. They release a subtle, zesty warmth that lingers on the palate.
- Celery seeds
A classic pickling spice, celery seeds add an earthy, slightly bitter undertone that rounds out the sweet-and-sour flavor.
- Ground turmeric
Turmeric lends a vibrant golden hue and a mild, earthy aroma. Its bright color is what gives bread and butter pickles that signature sunshine glow.
- Ground cloves
Just a hint of ground cloves brings a warm spiciness, with floral notes that complement the cinnamon and turmeric.
- Ground cinnamon
Cinnamon introduces a comforting warmth and subtle sweetness. It blends seamlessly with cloves and turmeric to create a complex spice profile.
HOW TO MAKE BREAD AND BUTTER PICKLES
Let’s walk through the simple, seven-step process to turn fresh vegetables into a pantry full of sweet-and-spicy bread and butter pickles. With a little patience and a few basic techniques, you’ll master this recipe in no time.
1. Combine Vegetables and Salt
In a large bowl, toss together the thinly sliced cucumbers, onions, and green peppers. Sprinkle kosher salt over the mixture and mix well so each slice is coated. Let the vegetables sit for about 1 hour; during this time, the salt will draw out excess moisture, ensuring a crisp final texture.
2. Rinse and Drain
After the soaking period, rinse the vegetables under cold water to wash away the extra salt. Transfer everything to a colander and let it drain thoroughly. This step prevents the pickles from becoming overly salty.
3. Prepare the Brine
In a large pot, combine apple cider vinegar, granulated sugar, mustard seeds, celery seeds, ground turmeric, ground cloves, and ground cinnamon. Place the pot over medium-high heat and bring the mixture to a boil, stirring constantly until the sugar is fully dissolved and the spices begin to release their aromas.
4. Simmer with Vegetables
Carefully add the drained vegetable mixture into the hot brine. Reduce the heat to medium and let everything simmer for about 10 minutes, stirring occasionally so that all slices are evenly coated and heated through.
5. Pack Jars
Using a slotted spoon or tongs, pack the hot pickles into sterilized jars, leaving approximately ½ inch of headspace at the top to allow for expansion during sealing.
6. Seal Jars in Boiling Water Bath
Wipe the jar rims clean to ensure a proper seal, then place the lids on top. Submerge the jars in a boiling water bath for 10 minutes—this step kills any lingering bacteria and seals the jars for long-term storage.
7. Cool and Rest
Carefully remove the jars from the water bath and set them on a towel-lined surface. Let them cool completely at room temperature before moving. Store in a cool, dark place and wait at least 1 week to allow the flavors to develop fully before opening.
SERVING SUGGESTIONS FOR BREAD AND BUTTER PICKLES
Once your bread and butter pickles have rested and developed their sweet-and-spicy personality, it’s time to enjoy them in all kinds of delightful ways. These tangy pickles bring a pop of color, texture, and flavor to virtually any dish. From elevating simple snacks to creating unexpected flavor contrasts, they’re an incredibly versatile companion in the kitchen.
- Sandwich Supreme
Layer thick slices of these pickles on your favorite grilled cheese, turkey club, or classic BLT. The combination of sweet vinegar and warm spices cuts through rich meats and melted cheeses, adding crunchy brightness to each bite.
- Charcuterie Hero
Arrange pickle slices on a charcuterie board alongside cured meats, soft cheeses, and nutty crackers. Their glossy, golden slices provide both visual appeal and a palate-cleansing tang between richer selections like pâté and aged cheddar.
- Salad Revamp
Chop pickles into bite-sized pieces and toss them into potato salad, coleslaw, or grain bowls. Their crisp texture and sweet-tart bite offer a refreshing counterpoint to creamy dressings and hearty grains.
- Snack-Time Jar
Keep a small bowl of pickles nearby for a quick, healthy snack. The satisfying crunch and zesty sweetness make them perfect for munching on during busy afternoons or serving with a platter of fresh veggies and dip.
HOW TO STORE BREAD AND BUTTER PICKLES
Proper storage ensures that your homemade bread and butter pickles maintain their texture, flavor, and safety over time. With just a few simple considerations, you’ll be able to enjoy these sparkling jars of goodness for months—and in many cases, up to a full year if sealed correctly. Whether you plan to tuck them away for future meals or keep them within easy reach, here are the best methods to preserve their peak quality:
- Pantry Storage
After completing the boiling water bath and letting the jars cool, store them upright in a cool, dark place such as a pantry or cellar. This environment maintains steady temperatures and keeps light at bay, preserving color and flavor. Properly sealed jars can last up to 12 months.
- Refrigerator Reserve
If you prefer not to water-bath, simply pack pickles into airtight containers and refrigerate. While these won’t have the same vintage appeal, they stay crisp and delicious for up to 2 months. This method is perfect when you’re short on canning equipment or patience.
- Labeling for Freshness
Always write the packing date on each jar before storing. Clear labeling helps you rotate your stock and ensures you enjoy the pickles within their optimal flavor window. Once opened, refrigerated jars remain tasty for 3–4 weeks.
- Freezer Experimentation
While not traditional, you can freeze small portions in freezer-safe bags—just be mindful that the texture may soften slightly. Use frozen pickles primarily for cooking applications like sauces or stews, where crunch is less critical, and enjoy their flavor up to 6 months later.
CONCLUSION
This article has walked you step by step through the delightful world of homemade bread and butter pickles, from the first crunchy slice of cucumber to the sweet-and-spicy symphony that fills each jar after a week of resting. We began with the simple premise of transforming garden-fresh vegetables into tangy treasures, highlighting the beginner-friendly process that requires just a handful of pantry spices and basic kitchen tools. You learned about the key ingredients—crisply sliced cucumbers, sweet onions, zesty green bell pepper, and a brine enriched with apple cider vinegar, sugar, and a trio of warming spices—and how each element works in harmony to create those signature flavors. The detailed instructions guided you through salting and rinsing to preserve crispness, simmering in brine to meld tastes, and sealing jars in a boiling water bath for long-term storage. Our serving suggestions revealed ways to brighten sandwiches, charcuterie boards, salads, and even snack jars, while the storage section explained how proper pantry, refrigerator, or freezer methods can extend the life of these pickles for months. Remember that this recipe yields about four pint-sized jars, each delivering roughly 120 calories per ¼-cup serving—and that you can print this article and save it in your personal recipe collection for whenever the pickle craving strikes. You’ll also find a FAQ section below to answer common canning questions and troubleshoot any hurdles.
Whether you’re a seasoned canner or a curious beginner, these bread and butter pickles promise crunchy satisfaction and sweet-tangy complexity in every bite. Feel free to adjust the sweetness by dialing back the sugar or experiment with extra spices like a pinch more mustard seed or a hint of crushed red pepper for heat. If you try this recipe, please let me know how it turns out—your feedback, questions, and shared tips are always welcome. Did the slices stay crisp? Did you serve them alongside your favorite burger or gift them to a friend? Comment below with your experiences, and I’m happy to help troubleshoot any part of the process. This community thrives on shared stories and kitchen victories, so don’t hesitate to chime in with questions, ideas, or simply to say hi after your first jar pops open. Happy pickling!
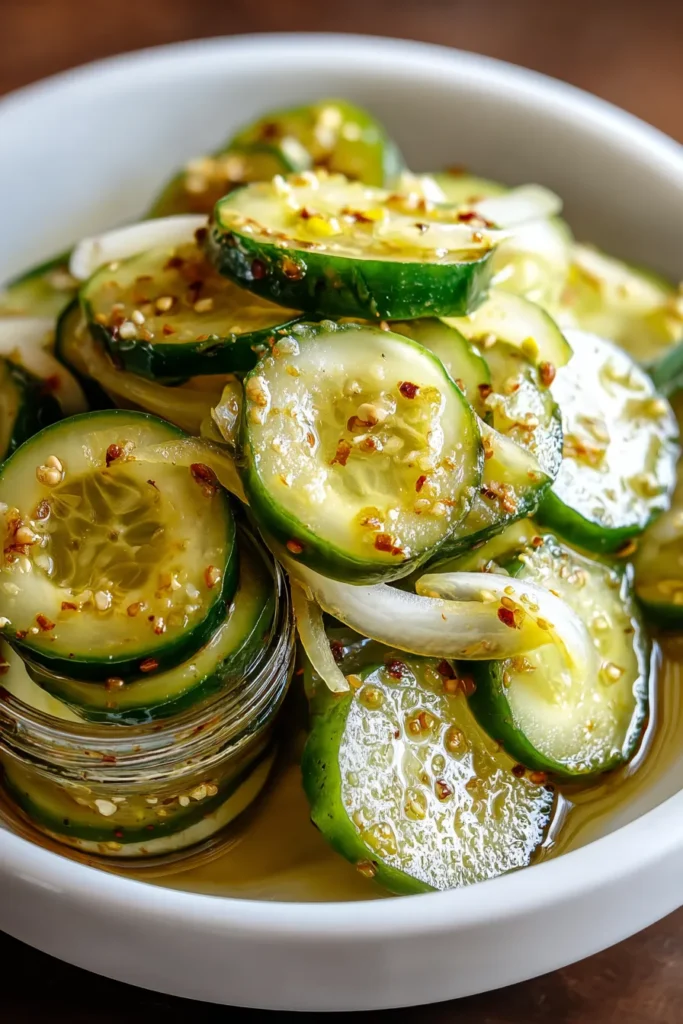

Bread and Butter Pickles
Description
Crispy cucumbers, vibrant onions, and a dash of spice come together in this easy recipe for homemade bread and butter pickles that brighten any meal.
Ingredients
Instructions
-
In a large bowl, combine the sliced cucumbers, onions, and green peppers. Sprinkle with kosher salt and mix well. Allow the mixture to sit for about 1 hour to draw out excess moisture.
-
After an hour, rinse the vegetables under cold water to remove excess salt and drain them in a colander.
-
In a large pot, combine the apple cider vinegar, sugar, mustard seeds, celery seeds, turmeric, cloves, and cinnamon. Bring the mixture to a boil over medium-high heat, stirring until the sugar is dissolved.
-
Add the drained vegetable mixture to the pot. Reduce the heat to medium and simmer for about 10 minutes, ensuring all the vegetables are coated and heated through.
-
Carefully pack the hot pickles into sterilized jars, making sure to leave about 1/2 inch of headspace at the top.
-
Wipe the rims clean and seal with lids. Process in a boiling water bath for 10 minutes to seal.
-
Remove the jars from the water bath and let them cool completely at room temperature. Store in a cool, dark place for at least 1 week to allow the flavors to develop fully.
Note
- Bread and butter pickles are traditionally sweet with a hint of spice, making them perfect for sandwiches or as a side.
- This recipe yields about 4 pint-sized jars.
- You can adjust the sweetness by reducing the amount of sugar if desired.
- Be sure to use pickling cucumbers for a firmer texture.
- These pickles will keep well for up to a year if properly sealed and stored.

