

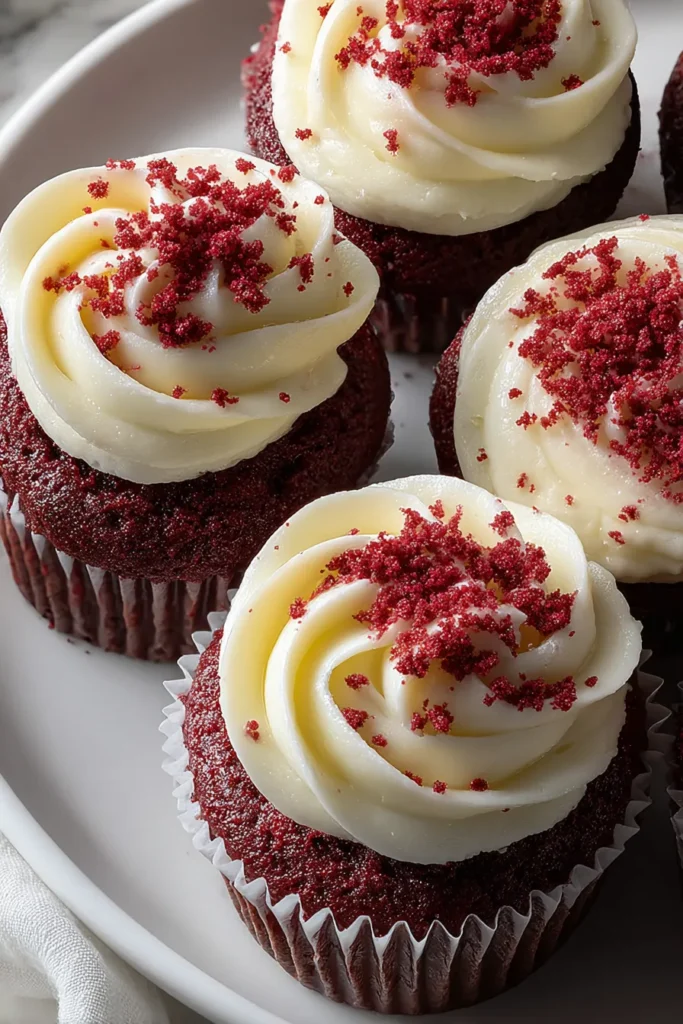
There’s something delightfully wicked about these Bloody Red Velvet Cupcakes that makes your next Halloween bash absolutely unforgettable. Rich, moist, and tinged with a crimson hue that’s equal parts spooky and sensational, each bite offers a tender crumb with just a hint of cocoa. The luscious cream cheese frosting adds a tangy sweetness that plays off the cake’s subtle chocolate notes, and when you finish them with a dramatic splatter of red gel icing—voilà—you’ve got a dessert that’s both artful and eerily delicious. Whether you’re hosting a haunted house party or just want to impress trick-or-treaters, these cupcakes bring theatrical flair to your dessert table without sacrificing taste.
Beyond their chilling good looks, these cupcakes are surprisingly approachable for home bakers. With an intermediate difficulty level, you’ll flex your baking muscles just enough to feel proud of the result, but without any hair-pulling moments. The whole process—from mixing to baking to decorating—takes about 20 minutes of prep time, 20 minutes in the oven, and around 30 minutes of patience while they cool (so the frosting glides on beautifully). At roughly 270 calories per cupcake, they’re decadent enough to indulge your cravings while still keeping portions in check. So grab your apron, unleash your inner ghoul chef, and get ready to create a batch of treats that taste every bit as good as they look.
KEY INGREDIENTS IN BLOODY RED VELVET CUPCAKES
Every hauntingly good recipe starts with carefully chosen ingredients that work together to deliver perfect texture, flavor, and color. For these Bloody Red Velvet Cupcakes, we rely on classic baking staples plus a few theatrical touches to achieve that vibrant red crumb and creamy frosting finish.
- All-purpose flour
Provides the structure and tender crumb that form the cupcake’s soft, moist foundation.
- Baking soda
Acts as a leavening agent, ensuring the cupcakes rise beautifully and develop a light, airy texture.
- Salt
Balances sweetness and enhances the depth of flavor in the red velvet base.
- Unsweetened cocoa powder
Adds a subtle chocolate undertone, giving the crumb its characteristic velvet richness.
- Unsalted butter
Contributes richness, moisture, and a melt-in-your-mouth texture when creamed with sugar.
- Sugar
Sweetens the batter and helps create a tender, fine crumb when beaten with butter.
- Large eggs
Provide structure, moisture, and binding—essential for that perfect cupcake lift.
- Vanilla extract
Brings warmth and aromatic depth to both the cake and the frosting.
- Buttermilk
Introduces a gentle tang and tenderizing acid that reacts with baking soda for lift.
- Red food coloring
Delivers the dramatic, bloody-red hue that makes these cupcakes so striking.
- White vinegar
Reacts with the leavening and buttermilk to enhance rise and create a tender crumb.
- Cream cheese
The star of the frosting, lending tangy creaminess and smooth texture.
- Confectioners’ sugar
Sweetens and thickens the cream cheese frosting to a fluffy consistency.
- Red gel icing
Used for decoration, it splatters easily to create that signature “blood-spattered” effect.
HOW TO MAKE BLOODY RED VELVET CUPCAKES
Before diving into the step-by-step instructions, take a moment to gather all your ingredients and line up your tools. With everything within arm’s reach—from the flour and cocoa to the red gel icing—you’ll breeze through the process and stay in the spooky spirit.
1. Preheat your oven to 350°F (175°C) and line a 12-cup muffin tin with cupcake liners, ensuring even heat circulation and preventing sticking.
2. In a medium bowl, sift together the flour, baking soda, salt, and cocoa powder. This aerates the dry ingredients and removes any lumps, giving your cupcakes a fine, tender crumb. Set the mixture aside.
3. In a large mixing bowl, cream together the softened butter and sugar until the blend is light and fluffy—about 3–4 minutes on medium speed. This step traps air, creating the lift in your cupcakes.
4. Beat in the eggs, one at a time, mixing well after each addition. This helps with emulsification and ensures a smooth batter. Stir in the vanilla extract until evenly distributed.
5. In a separate small bowl, whisk together the buttermilk and red food coloring until the hue is uniform. Pour this mixture into the butter-egg blend and mix on low speed until just combined.
6. Gradually add the sifted dry ingredients to the wet mixture, stirring gently until there are no streaks of flour. Be careful not to overmix, which can lead to dense cupcakes.
7. Stir in the white vinegar until the batter is perfectly smooth. The vinegar’s acidity reacts with the baking soda, giving extra lift and tenderness.
8. Divide the batter evenly among the cupcake liners, filling each about two-thirds full for ideal rise without overflow.
9. Bake for 18–22 minutes, or until a toothpick inserted into the center comes out clean. Transfer the cupcakes to a wire rack and let them cool completely before frosting.
10. To make the frosting, beat the softened cream cheese and butter together until smooth and lump-free, about 2 minutes.
11. Gradually add the confectioners’ sugar, beating until fluffy, and then mix in the vanilla extract for extra flavor.
12. Once the cupcakes are fully cooled, spread the cream cheese frosting over each one using a small spatula or knife for an even layer.
13. Finally, create the “bloody” effect by using red gel icing to splatter the tops of the frosted cupcakes, giving them a dramatic, spattered finish.
SERVING SUGGESTIONS FOR BLOODY RED VELVET CUPCAKES
These cupcakes are almost too spooky (and delicious) to handle, but with the right presentation, you’ll take your dessert table from eerie to epic. Themed lighting, props like miniature skulls or cobwebs, and a cohesive color palette will elevate the entire experience. Whether you’re hosting a full-blown Halloween extravaganza or just want a fun weekend treat, here are some creative ways to serve your bloody cupcakes for maximum impact and enjoyment.
- Blood-Spattered Platter
Arrange the cupcakes on a dark slate or black serving tray. Use leftover red gel icing to create splatters around the base—this continuous “blood pool” effect ties the theme together and looks impressively gory.
- Gothic Tiered Stand
Elevate your cupcakes on a tiered dessert stand draped with faux cobwebs. Add a few plastic spiders or small skulls on each level to build a chilling, multi-dimensional display that guests can’t resist.
- Sinister Drink Pairing
Serve alongside vampire-themed beverages like deep-red sangria or a hot chocolate spiked with a dash of chili for warmth. Present in glass drink dispensers labeled “Witch’s Brew” to complete the spooky-sweet combo.
- Edible Garnish Accents
Top each cupcake with fresh raspberries, blackberries, or edible glitter for a striking contrast. The bright fruit and subtle shimmer give a gourmet spin to your hauntingly beautiful treats.
HOW TO STORE BLOODY RED VELVET CUPCAKES
Once you’ve summoned these creepy confections, you’ll want to keep them fresh and flavorful for as long as possible. Proper storage ensures the cupcakes don’t dry out and the cream cheese frosting stays creamy without weeping. Whether you’re prepping a day ahead or saving leftovers for later indulgence, follow these tips to maintain that signature texture and taste.
- Room Temperature (Up to 24 Hours)
Store the cupcakes in an airtight container at cool room temperature if you plan to serve them within a day. This keeps the cake tender and the frosting firm enough to hold its shape without refrigeration.
- Refrigeration (1–3 Days)
Place the cupcakes in a sealed container and refrigerate. The cooler environment preserves the cream cheese frosting, but allow the cupcakes to come back to room temperature for 30 minutes before serving to soften the cake and enhance flavor.
- Freezing (Up to 1 Month)
For longer storage, flash-freeze the unfrosted cupcakes on a baking sheet until firm, then transfer to a freezer-safe bag. When ready to enjoy, thaw overnight in the fridge, frost as directed, and splatter with red icing just before serving for that fresh, bloody look.
- Separate Storage for Frosting
If you prefer to bake in advance, store frosting in an airtight jar in the refrigerator. Bring it back to room temperature and re-whip for a perfectly smooth consistency before applying it to chilled cupcakes.
CONCLUSION
From the first crimson crumb to the final red gel splatter, these Bloody Red Velvet Cupcakes offer an unforgettable fusion of flavor, fun, and fright—perfect for your next spooky gathering. We’ve walked through every step, from sifting the flour and cocoa to whipping up that tangy cream cheese frosting and delivering a hair-raising decorative finish. With just 20 minutes of prep, 20 minutes of baking, and a short 30-minute cooling period, you’ll transform basic pantry staples into show-stopping Halloween desserts. The recipe’s intermediate difficulty makes it a rewarding project for eager home bakers, and at around 270 calories per serving, these cupcakes strike the perfect balance between indulgence and portion control.
Feel free to print this article or save it to your favorite recipe collection for future hauntingly delicious moments. You’ll also find a FAQ below to answer any lingering questions about techniques, ingredient swaps, or troubleshooting. If you give these cupcakes a try, I’d love to hear how they turned out—drop a comment, ask questions, or share your spooky decorating hacks. Your feedback helps me refine and conjure up even more festive baking ideas. Happy haunting and happy baking!

Bloody Red Velvet Cupcakes
Description
These moist red velvet cupcakes, topped with rich cream cheese frosting and a bloody gel icing effect, create a thrilling dessert that’s both fun and festive for Halloween!
Ingredients
Instructions
-
Preheat your oven to 350°F (175°C) and line a 12-cup muffin tin with cupcake liners.
-
In a medium bowl, sift together the flour, baking soda, salt, and cocoa powder. Set aside.
-
In a large mixing bowl, cream together the butter and sugar until light and fluffy.
-
Beat in the eggs, one at a time, mixing well after each addition. Stir in the vanilla extract.
-
Mix the buttermilk and red food coloring in a separate bowl until blended. Add this to the butter mixture and combine.
-
Gradually add the dry ingredients to the wet ingredients, stirring until just combined.
-
Stir in the white vinegar until the batter is smooth.
-
Divide the batter evenly among the cupcake liners, filling each about two-thirds full.
-
Bake for 18-22 minutes, or until a toothpick inserted into the center comes out clean. Allow the cupcakes to cool completely on a wire rack.
-
To make the frosting, beat the cream cheese and butter together until smooth.
-
Gradually add the confectioners' sugar, beating until fluffy, and then mix in the vanilla extract.
-
Once the cupcakes are cool, spread the cream cheese frosting over each cupcake.
-
To create the "bloody" effect, use red gel icing and splatter it over the frosted cupcakes to make them appear blood-spattered.
Note
- These cupcakes are perfect for Halloween or any spooky-themed event.
- You can adjust the intensity of the red color by altering the amount of food coloring.
- For extra chocolatey flavor, increase the amount of cocoa powder by a tablespoon.

