

There’s something undeniably comforting about sinking your teeth into a tender, flaky scone that’s been lovingly baked to golden perfection. These bakery-style pumpkin scones bring that warm, cozy feeling straight into your kitchen—no café queue required. Each bite offers a delicate crumb that practically melts in your mouth, revealing subtle whispers of cinnamon, nutmeg, ginger, and cloves. The brown sugar in the dough adds a gentle caramel note that balances the earthy sweetness of the pumpkin, while the buttery richness ties everything together. It’s like wrapping your hands around a steaming mug of coffee, watching the steam curl into the air on a crisp autumn morning.
These scones aren’t just about taste—they’re an experience. As you slice through the dough and set the triangles to bake, you’ll catch hints of spice teasing your senses, promising something special when the timer dings. Brushing a sweet cinnamon glaze over the warm tops allows it to seep into every crack and cranny, creating that bakery-style finish that feels indulgent and effortless. Whether you’re sharing these with loved ones at a weekend brunch or savoring one quietly on your back porch, they have a way of making ordinary moments feel extraordinary. Cozy, spiced, and warmly welcoming, these pumpkin scones are a delicious reminder that sometimes the simplest recipes bring the biggest smiles.
KEY INGREDIENTS IN BAKERY-STYLE PUMPKIN SCONES
Before diving into the dough, let’s get acquainted with the heroes of this recipe. Each ingredient has been chosen to create that dreamiest, fluffiest scone with layers of autumn flavor. From pantry staples to seasonal pumpkin puree, here’s what you’ll need and why.
- All-purpose flour
Provides the structure for the scones, creating that tender yet sturdy crumb that holds up to glazing and gentle slicing without falling apart.
- Light brown sugar
Brings a subtle molasses undertone and just the right amount of sweetness, complementing the pumpkin’s natural sugars and enriching the dough’s color.
- Baking powder
The leavening agent that helps your scones rise and become delightfully airy, giving them that bakery-quality lift.
- Salt
Enhances all the flavors, cutting through the sweetness and balancing the spices so each element shines.
- Ground cinnamon
Infuses warmth and a classic autumn spice note that instantly evokes thoughts of crisp air and falling leaves.
- Ground nutmeg
Adds a hint of subtle nuttiness and a layer of complexity to the spice blend.
- Ground ginger
Introduces a gentle heat and brightness, rounding out the warmth of the cinnamon and nutmeg.
- Ground cloves
Just a pinch brings an exotic depth and slightly peppery edge, keeping the spice profile interesting.
- Cold unsalted butter
Cut into small cubes, it creates pockets of steam as the scones bake, yielding those irresistible flaky layers.
- Canned pumpkin puree
The heart of these scones—moist, rich, and perfectly spiced, it adds both color and that signature pumpkin flavor.
- Heavy cream
Contributes tenderness and richness to the dough, ensuring a moist, melt-in-your-mouth texture.
- Egg
Binds everything together, adding structure, color, and a bit of extra richness.
- Vanilla extract
Rounds out the flavor profile with its sweet floral notes, making each bite taste blissfully complete.
For the glaze:
- Confectioners’ sugar
Offers a silky, smooth base that transforms into a glossy icing.
- Milk
Thins the sugar just enough to drizzle.
- Ground cinnamon (optional)
A final touch of spice that makes the glaze extra cozy and aromatic.
HOW TO MAKE BAKERY-STYLE PUMPKIN SCONES
Let’s roll up our sleeves and bring these scones to life. From whisking the dry mix to glazing the golden tops, follow these steps to achieve that perfect bakery-style result at home.
1. Preheat your oven to 400°F (200°C) and line a baking sheet with parchment paper to prevent sticking and ensure even browning.
2. In a large mixing bowl, whisk together the flour, brown sugar, baking powder, salt, cinnamon, nutmeg, ginger, and cloves until everything is evenly combined and fragrant.
3. Add the cold butter pieces to the flour mixture and, using a pastry cutter or two knives, cut the butter into the flour until the mixture resembles coarse crumbs dotted with pea-sized bits of butter.
4. In another bowl, combine the pumpkin puree, heavy cream, egg, and vanilla extract. Whisk this mixture until it’s smooth and fully blended, with no streaks of egg or cream remaining.
5. Pour the wet ingredients into the dry ingredients and mix gently until just combined. The dough should hold together but remain slightly sticky and shaggy—avoid over-mixing to keep your scones tender.
6. Turn the dough out onto a lightly floured surface and gently pat it into a rectangle about 1 inch thick, taking care not to compress it too much.
7. Using a sharp knife or a pastry cutter, cut the dough into triangles or squares—your preference! Aim for even portions so they bake uniformly.
8. Place the scones on the prepared baking sheet, leaving enough space (about 1–2 inches) between each piece to allow for expansion.
9. Bake the scones for 14–16 minutes, or until the edges are golden and the centers spring back when lightly touched. Transfer them to a wire rack to cool slightly.
10. For the glaze, whisk together the confectioners’ sugar and milk until smooth, adding ground cinnamon if you like a little extra warmth.
11. Drizzle the glaze over the warm scones, allowing it to set for a few minutes before serving so each scone is perfectly coated.
SERVING SUGGESTIONS FOR BAKERY-STYLE PUMPKIN SCONES
These pumpkin scones are already a star on their own, but pairing them with the right accompaniments can elevate your breakfast or snack to something extraordinary. Whether you’re hosting a brunch or enjoying a solo treat, here are some delightful serving ideas that bring out every nuance of flavor.
- With a dollop of whipped cream and fresh berries
Top each warm scone with a spoonful of lightly sweetened whipped cream and scatter vibrant fresh berries—strawberries, blueberries, or raspberries—for a pop of color, creaminess, and tart contrast.
- Alongside a spiced latte or chai tea
Serve these scones with a steaming mug of pumpkin spice latte or masala chai. The aromatic blend of cardamom, cinnamon, and ginger in your drink will echo the scone’s spices for a harmonious autumn ensemble.
- Slathered with honey butter
Unleash the ultimate comfort by mixing softened butter with a drizzle of honey and a pinch of cinnamon, then spreading it generously over a warm scone so the flavors meld into a gooey, sweet symphony.
- Paired with smoked turkey and sharp cheddar
For a savory twist, set up a mini sandwich station: slice the scones in half and fill with thinly sliced smoked turkey and sharp cheddar cheese. The creamy pumpkin dough balances the smoky meat, making for a unique brunch offering.
HOW TO STORE BAKERY-STYLE PUMPKIN SCONES
Keeping your scones fresh and flavorful is easy when you follow a few simple storage tips. Whether you plan to enjoy leftovers over the next few days or freeze them for later, these methods will help retain that freshly-baked goodness.
- Room temperature in an airtight container
Once completely cooled, place scones in a sealed container lined with a paper towel to absorb any excess moisture. They’ll stay fresh for up to two days at room temperature, perfect for quick breakfasts.
- Refrigeration for longer shelf life
If you want them to last longer (up to a week), store scones in a refrigerator-safe container. Add a sheet of parchment between layers to prevent sticking, and bring to room temperature or warm briefly before serving.
- Freezing individually wrapped
Wrap each cooled scone tightly in plastic wrap, then place them in a zip-top freezer bag. Freeze for up to three months. When you’re ready, thaw overnight in the fridge or at room temperature for a couple of hours.
- Reheating to revive freshness
Whether thawed or refrigerated, pop scones in a preheated 350°F oven for 5–7 minutes or microwave on low for 20–30 seconds. This revives the flaky texture and warms the glaze just enough for an irresistible treat.
CONCLUSION
Recapping everything we’ve covered, these bakery-style pumpkin scones bring café-quality charm to your kitchen with minimal effort. From the tender crumb delivered by cold butter cut into flour, to the warmly spiced pumpkin dough and the sweet, cinnamon-scented glaze, each component is designed to delight your senses. You have all the details to whip up these scones in about 20 minutes of prep and just under 16 minutes in the oven, plus a brief resting time that builds anticipation while you set the table or brew your favorite morning beverage. Whether you’re a novice baker exploring fall flavors for the first time or a seasoned home chef looking for a cozy new favorite, this recipe ticks all the boxes: it’s approachable, beginner-friendly, and endlessly customizable with nuts, chocolate chips, or alternative spices.
Feel free to print this article and save it for later, tucking it into your recipe binder or kitchen drawer for those chilly mornings when you crave something special. You’ll also find a FAQ below to answer common questions—from ingredient swaps to texture tweaks—so you can bake with confidence. If you give these pumpkin scones a try, come back and share your experience. Questions, comments, tweaks, or feedback—every note helps our community grow and savor more delicious moments together. Happy baking!
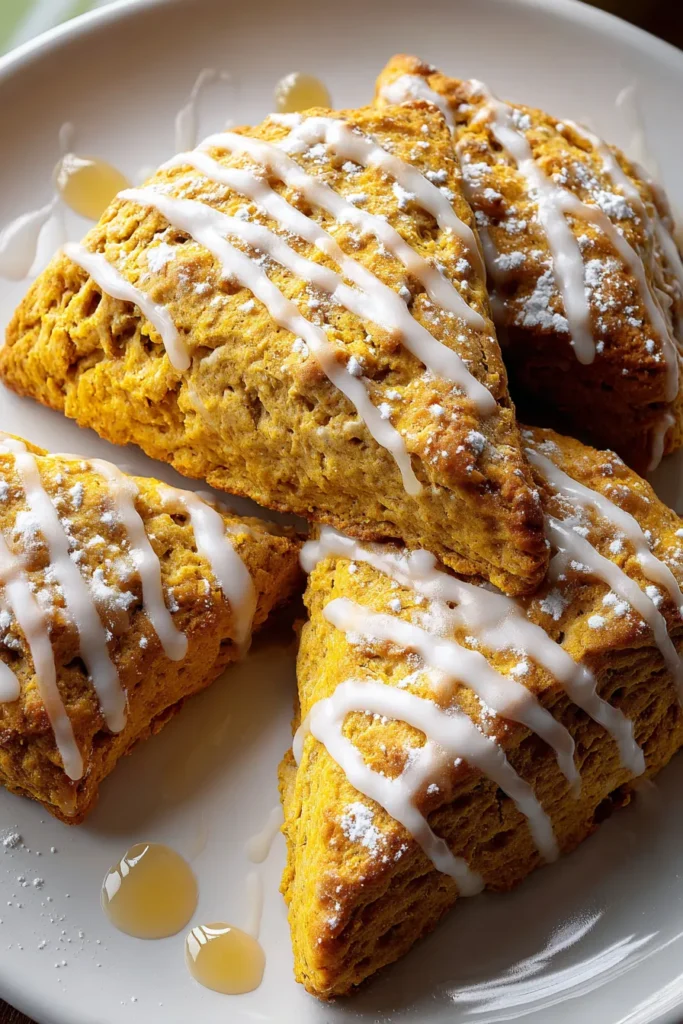

Bakery-Style Pumpkin Scones
Description
These bakery-style pumpkin scones are tender, spiced with warming flavors, and topped with a sweet glaze. Perfect for brightening up any chilly morning!
Ingredients
Instructions
-
Preheat your oven to 400°F (200°C) and line a baking sheet with parchment paper.
-
In a large mixing bowl, whisk together the flour, brown sugar, baking powder, salt, cinnamon, nutmeg, ginger, and cloves.
-
Add the cold butter pieces to the flour mixture and using a pastry cutter or two knives, cut the butter into the flour until it resembles coarse crumbs.
-
In another bowl, combine the pumpkin puree, heavy cream, egg, and vanilla extract. Whisk this mixture until it is well blended.
-
Pour the wet ingredients into the dry ingredients and mix until just combined. The dough will be slightly sticky.
-
Turn the dough out onto a floured surface and gently pat it into a rectangle about 1-inch thick.
-
Using a sharp knife or a pastry cutter, cut the dough into triangles or squares, whichever you prefer.
-
Place the scones on the prepared baking sheet, spacing them apart to allow for expansion.
-
Bake the scones for 14-16 minutes, or until they are golden brown. Remove them from the oven and let them cool slightly on a wire rack.
-
For the glaze, whisk together the confectioners’ sugar and milk until smooth. If desired, stir in the ground cinnamon.
-
Drizzle the glaze over the warm scones and let it set before serving.
Note
- Pumpkin scones taste even better the next day, so they are a great make-ahead breakfast option.
- For a twist, add a handful of chopped nuts or chocolate chips to the dough before baking.
- These scones pair wonderfully with hot coffee or tea on a chilly morning.
- Adding the glaze while the scones are still warm allows some of it to soak in, enhancing the flavor.

