

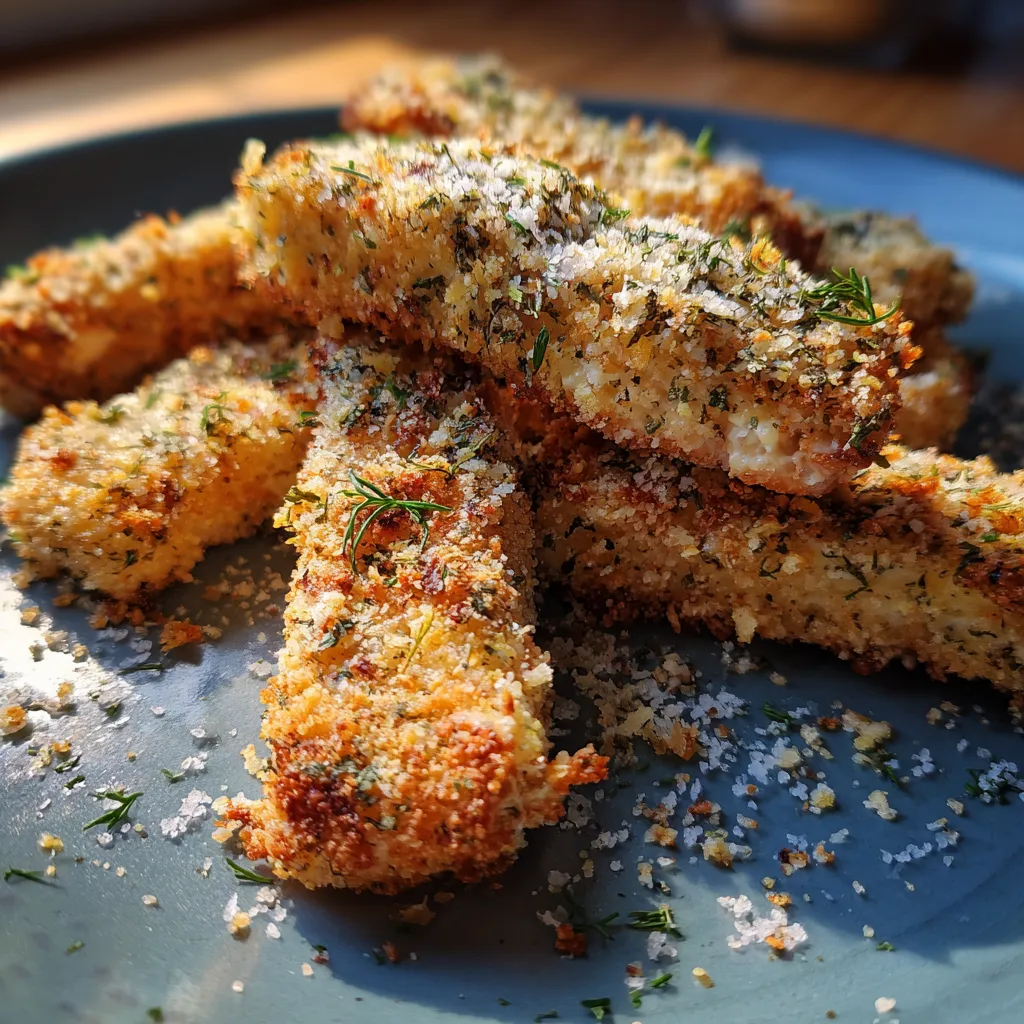
Baked Canned Tuna Fish Sticks take a humble pantry staple and turn it into a crunchy, golden snack that’s both satisfying and simple. These crispy homemade tuna sticks baked to golden perfection boast a tender, cheesy center and bright lemon notes in every bite. Whether you’re dipping them in tartar sauce or ketchup, they make an easy snack or light meal that’s sure to become a new favorite.
Key Ingredients
Start by gathering the essentials for these crunchy tuna sticks. Each ingredient plays a specific role in creating that perfect balance of flavor and texture:
- 2 cans tuna, drained: Flaky fish packed with protein that forms the base of the sticks.
- 1 cup panko breadcrumbs: Provides an extra-crispy coating for that satisfying crunch.
- ½ cup grated Parmesan cheese: Adds a salty, cheesy depth to the center.
- ¼ cup mayonnaise: Acts as a binder and brings moisture to the mixture.
- 1 egg, beaten: Helps hold the tuna blend together during shaping.
- 1 tsp lemon zest: Brightens the flavor with fresh citrus notes.
- ½ tsp garlic powder: Infuses a gentle garlic aroma throughout the sticks.
- ½ tsp onion powder: Lends a subtle savory sweetness.
- ¼ tsp salt: Enhances all the flavors evenly.
- ¼ tsp black pepper: Adds a gentle, warming bite.
- Cooking spray, as needed: Prevents sticking and ensures an even golden crust.
How To Make Baked Canned Tuna Fish Sticks
You’re just a few simple steps away from enjoying these crispy tuna sticks. The process is straightforward—mix, shape, coat, and bake—and you’ll end up with sticks that are golden-brown on the outside and tender inside:
1. Preheat your oven to 400°F (200°C) and line a baking sheet with parchment or coat it with cooking spray to prevent sticking.
2. In a large bowl, combine drained tuna, mayonnaise, Parmesan cheese, lemon zest, beaten egg, garlic powder, onion powder, salt, and pepper until all flavors are incorporated.
3. Mix thoroughly with a spoon or your hands until the mixture holds together and looks uniform in texture.
4. Shape the tuna blend into sticks about 3 inches long, pressing firmly so each piece stays cohesive.
5. Coat each stick with panko breadcrumbs, pressing lightly to ensure the crumbs adhere evenly.
6. Arrange the coated sticks on the prepared baking sheet, leaving a little space between each for air circulation.
7. Bake for 15 to 18 minutes, or until the exterior turns deep golden brown and achieves a crispy finish.
8. Remove from the oven and let the sticks cool for a couple of minutes before serving.
Serving Suggestions
These tuna sticks are super versatile and can shine in many settings. Whether you’re hosting a casual gathering or looking for a quick weeknight treat, here are a few ideas to elevate your presentation and flavor:
- Serve with a small ramekin of tartar sauce for a classic seafood pairing.
- Offer a trio of ketchup, spicy mayo, and mustard dip so guests can mix and match.
- Plate alongside a crisp green salad tossed in lemon vinaigrette for a light meal.
- Stack on a platter with lemon wedges and sprinkle fresh herbs for an elegant appetizer.
Tips For Perfect Baked Canned Tuna Fish Sticks
With just a few tweaks, you can fine-tune these sticks to suit your taste and pantry supplies. These friendly pointers will help you master the recipe every time:
- Panko breadcrumbs give extra crunch, but regular breadcrumbs work too—just press them firmly onto each stick.
- Stir in chopped fresh parsley or dill for added color and a herby twist.
- Serve with tartar sauce, ketchup, or lemon wedges for dipping and finish with a fresh squeeze of lemon.
- Store leftovers in an airtight container in the fridge for up to 2 days to maintain texture and flavor.
How To Store It
Keeping your tuna sticks fresh and flavorful is simple. Whether you’re saving leftovers for tomorrow’s lunch or prepping a batch in advance, these methods will help retain crispiness:
- Refrigerate in an airtight container for up to 2 days; reheat in a 350°F oven for 5–7 minutes to restore crunch.
- Freeze on a baking sheet until solid, then transfer to a freezer-safe bag for up to one month; bake from frozen at 375°F for 10–12 minutes.
- For quick reheating, pop sticks into a toaster oven at 350°F for 5 minutes until warmed and crisp.
- Store loosely covered with paper towels inside the container to absorb any excess moisture.
Frequently Asked Questions
Here are some quick answers to common questions about making these tuna sticks:
- How long does it take to prepare this recipe?
It takes about 25 minutes to prepare, which includes draining the tuna, zesting lemon, mixing ingredients, shaping the sticks, and preheating the oven, plus 15 to 18 minutes baking time.
- Can I substitute regular breadcrumbs for panko?
Yes, you can use regular breadcrumbs if panko is unavailable. The result will be slightly less crunchy but still tasty. Press the crumbs firmly onto each stick to ensure a good coating.
- What can I use instead of mayonnaise as a binder?
You can replace the mayonnaise with an equal amount of Greek yogurt or mashed avocado. These alternatives will help the mixture hold together while adding moisture and flavor.
- How do I ensure the tuna sticks come out crispy?
Make sure to coat each stick evenly with panko breadcrumbs and press gently to adhere. Arrange them on a greased baking sheet with space in between. Bake at 400°F for 15 to 18 minutes, and if needed, add 2 to 3 extra minutes for a deeper golden color.
- Can I freeze these tuna sticks for later?
Yes. Once baked and cooled, place the tuna sticks on a tray to freeze individually, then transfer them to a freezer-safe bag for up to one month. To reheat, bake from frozen at 375°F for 10 to 12 minutes until heated through.
- What are some recommended dipping sauces or sides?
Serve with tartar sauce, ketchup, or fresh lemon wedges. For a fuller meal, pair them with coleslaw, a green salad, steamed vegetables, or a grain salad like quinoa or couscous.
- How should I store leftovers and reheat them?
Store cooled leftovers in an airtight container in the refrigerator for up to two days. To reheat and maintain crispiness, bake at 350°F for 5 to 7 minutes or until warmed through.
What Makes This Special
These Baked Canned Tuna Fish Sticks are a delightful twist on ordinary tuna, delivering a crunchy exterior and tender, cheesy interior with zingy lemon notes in every bite. They work because the panko ensures maximum crispiness while the Parmesan and mayo create a flavorful, moist core. This recipe comes together in under 30 minutes, making it perfect for busy days or impromptu gatherings. Feel free to print and save this article for easy reference, and let me know in the comments if you have questions or feedback after trying it—you might just discover a new weeknight favorite!

Baked Canned Tuna Fish Sticks
Description
These tuna sticks bake up crunchy on the outside with a tender, cheesy center and bright lemon notes. Perfect for dipping in tartar sauce or ketchup, they’re an easy snack or light meal.
Ingredients
Instructions
-
Preheat oven to 400°F (200°C).
-
In a large bowl combine tuna, mayonnaise, Parmesan, lemon zest, egg, garlic powder, onion powder, salt, and pepper.
-
Mix until ingredients are evenly distributed and the mixture holds together.
-
Shape the mixture into sticks about 3 inches long and place them on a plate.
-
Coat each stick evenly with panko breadcrumbs, pressing lightly to adhere.
-
Arrange the coated sticks on a baking sheet sprayed with cooking spray.
-
Bake for 15 to 18 minutes, or until golden brown and crispy.
-
Remove from the oven and let cool slightly before serving.
Note
- Panko breadcrumbs give extra crunch, but regular breadcrumbs work too.
- Stir in chopped fresh parsley or dill for added color and flavor.
- Serve with tartar sauce, ketchup, or lemon wedges for dipping.
- Store leftovers in an airtight container in the fridge for up to 2 days.

