

Authentic Mexican Gorditas bring a little slice of Mexico right into your kitchen, combining tender, hand-pressed masa pockets with creamy refried beans, crumbly queso fresco, crisp lettuce, and tangy salsa verde. With just a handful of pantry staples and a trusty comal or nonstick skillet, you’ll be flipping golden discs of dough and transforming them into pillowy vessels bursting with flavor. Perfect for a casual dinner or a festive gathering, these gorditas are beginner-friendly, endlessly customizable, and sure to become a beloved staple in your home cook repertoire.
Key Ingredients
Building these gorditas couldn’t be simpler—each component plays a key role in creating that signature texture and taste.
- 2 cups masa harina: The foundation of each gordita, this finely ground corn flour yields soft, pliable dough.
- 1 teaspoon salt: Enhances the natural corn flavor and balances the richness of the beans and cheese.
- 1 1/4 cups warm water: Hydrates the masa harina into a cohesive, workable dough.
- 2 tablespoons vegetable oil: Keeps the comal or skillet slick, ensuring even browning without sticking.
- 1 cup refried beans: Creamy, savory filling that adds protein and depth of flavor.
- 1/2 cup crumbled queso fresco: Provides a tangy, crumbly contrast to the smooth beans.
- 1 cup shredded lettuce: Adds a refreshing crunch and bright color to each bite.
- 1/4 cup salsa verde: Brings a zesty, mildly spicy note for an authentic Mexican finish.
How To Make Authentic Mexican Gorditas
Creating these gorditas is as satisfying as it is straightforward. You’ll start by crafting a soft corn dough, then shape and cook each pocket to a golden, slightly puffed perfection. From resting the masa to slicing open each warmed disc, every step builds toward that irresistible moment when you fill them with beans, lettuce, cheese, and salsa. Gather your tools and let’s dive into the process!
1. In a bowl combine masa harina and salt then gradually add warm water mixing until a soft dough forms, ensuring there are no dry patches.
2. Knead the dough for about 2 minutes until smooth then cover with a damp cloth and rest for 10 minutes, allowing the masa to fully hydrate.
3. Divide the dough into 8 equal balls then flatten each into a disc about 1/4 inch thick using your palms or a tortilla press lined with plastic wrap.
4. Heat a comal or nonstick skillet over medium heat and brush lightly with vegetable oil to prevent sticking and promote even browning.
5. Cook each gordita for about 2 minutes on each side until golden brown and puffed slightly, adjusting heat as needed to avoid burning.
6. Remove from heat and let cool for a minute then carefully slice open one side without cutting through completely, creating a pocket for stuffing.
7. Fill each gordita with refried beans shredded lettuce crumbled queso fresco and salsa verde then serve warm for the best texture and flavor contrast.
Serving Suggestions
These gorditas shine when served with complementary sides and toppings that enhance their comforting, street-food charm. Whether you’re hosting a casual taco night or simply craving Mexican flavors, these ideas will make your plate a crowd-pleaser.
- Serve with warm Mexican rice and black beans on the side to turn your gorditas into a hearty, filling meal.
- Top with fresh pico de gallo or chopped tomatoes, onions, and cilantro for a burst of color and bright acidity.
- Drizzle with Mexican crema or sour cream to add a cool, tangy layer that balances the spiciness of the salsa verde.
- Offer lime wedges and sliced jalapeños so everyone can customize the heat and tang to their taste.
Tips For Perfect Authentic Mexican Gorditas
Mastering gorditas is all about understanding your masa and keeping things simple yet precise. These friendly pointers will help you achieve tender, crack-free dough and perfectly warm pockets every time. Don’t be afraid to make them your own by swapping in favorite fillings while following these smart strategies.
- If the dough cracks add a little more water and knead until it holds together.
- Use high-quality masa harina specifically labeled for tortillas or tamales for best texture.
- Keep cooked gorditas warm wrapped in a clean kitchen towel until ready to serve.
- Feel free to customize the filling with meats chorizo or your favorite salsas for authentic flavor.
How To Store It
Once you’ve whipped up a batch of gorditas, proper storage ensures they stay soft and ready for later enjoyment. Whether you’re prepping ahead or saving leftovers, follow these methods to maintain their fresh, pillowy quality.
- Refrigerate in an airtight container: Layer gorditas with parchment paper to prevent sticking and keep them in the fridge for up to 3 days.
- Freeze individually wrapped: After cooking, let gorditas cool, wrap each in plastic wrap, and place in a zip-top bag; freeze for up to a month.
- Reheat on the comal: Warm straight from the fridge or freezer over low-medium heat, flipping until heated through and slightly crisped.
- Steam in a tortilla warmer: Pop them into a warmed tortilla warmer or an oven set to 200°F, wrapped in a clean towel, for gentle reheating.
Frequently Asked Questions
Here are answers to the most common questions about making these authentic Mexican gorditas at home:
- Q: What type of masa harina should I use for these gorditas?
A: Use high-quality masa harina specifically labeled for tortillas or tamales. These brands have the right grind and moisture-absorbency properties needed to achieve a tender, pliable dough that cooks evenly on a comal or nonstick skillet.
- Q: How can I tell if the dough needs more water or masa harina?
A: The dough should be soft and tacky but not sticky. If it cracks or crumbles when you flatten it, add warm water a teaspoon at a time and knead until smooth. If it sticks excessively to your hands, dust in a little more masa harina until you can handle it without residue.
- Q: Why is it important to let the dough rest under a damp cloth?
A: Resting for 10 minutes allows the masa to hydrate fully, resulting in a smoother texture and fewer cracks during cooking. Covering with a damp cloth prevents the surface from drying out, which helps maintain elasticity while you divide and shape the dough.
- Q: What is the ideal cooking temperature and timing for gorditas?
A: Preheat your comal or skillet over medium heat and brush lightly with vegetable oil to prevent sticking. Cook each side of the gordita for about 2 minutes until golden brown and slightly puffed. If the heat is too low, they won’t puff or brown properly; too high and they can burn before cooking through.
- Q: How can I keep gorditas warm and fresh if I'm making them in batches?
A: Wrap cooked gorditas in a clean kitchen towel and place them in a low-temperature oven (around 200°F) or a covered dish. The towel retains steam, keeping them soft but not soggy, so they stay warm and pliable until serving.
- Q: Can I customize the fillings beyond refried beans, queso fresco, lettuce, and salsa verde?
A: Absolutely. While the classic combination highlights creamy beans and tangy queso with crisp lettuce and zesty salsa, you can add seasoned meats like shredded chicken or chorizo, roasted vegetables, or pickled jalapeños. Just ensure fillings are pre-cooked and well-drained to avoid a soggy gordita.
What Makes This Special
These Authentic Mexican Gorditas work their magic through a perfect balance of simple, high-quality ingredients and straightforward techniques—no fancy equipment required. The tender masa pockets cradle savory beans, fresh lettuce, crumbly cheese, and zesty salsa for an explosion of textures and flavors in every bite. They’re fun to make, endlessly customizable, and perfect for sharing with friends and family. Print this guide, save it for later, and don’t forget to drop a comment if you try the recipe or need any help—your feedback always makes my day!
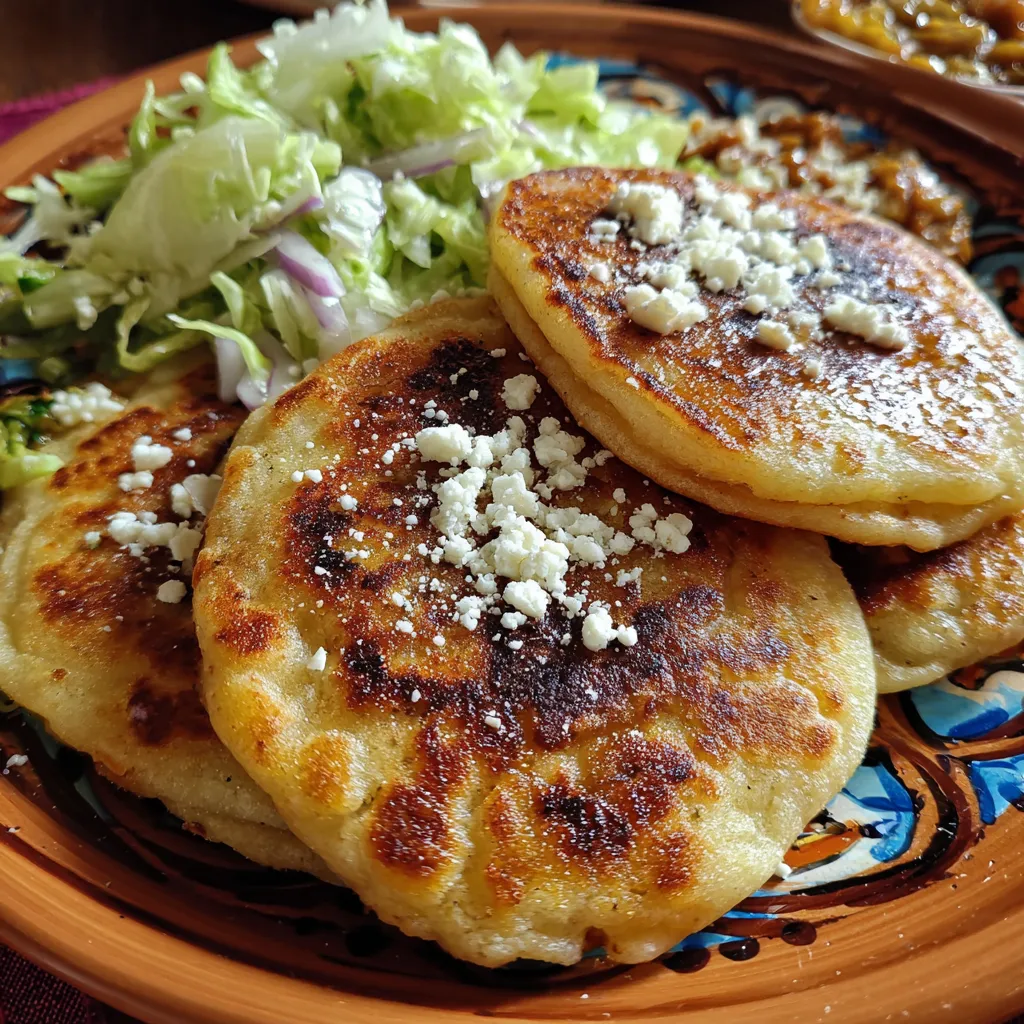

Authentic Mexican Gorditas
Description
Soft, golden gorditas crackle as they hit the comal, releasing warm masa aromas. Open the pillowy rounds and stuff with creamy beans, crisp lettuce, tangy salsa verde, and crumbly queso fresco.
Ingredients
Instructions
-
In a bowl combine masa harina and salt then gradually add warm water mixing until a soft dough forms.
-
Knead the dough for about 2 minutes until smooth then cover with a damp cloth and rest for 10 minutes.
-
Divide the dough into 8 equal balls then flatten each into a disc about 1/4 inch thick.
-
Heat a comal or nonstick skillet over medium heat and brush lightly with vegetable oil.
-
Cook each gordita for about 2 minutes on each side until golden brown and puffed slightly.
-
Remove from heat and let cool for a minute then carefully slice open one side without cutting through completely.
-
Fill each gordita with refried beans shredded lettuce crumbled queso fresco and salsa verde then serve warm.
Note
- If the dough cracks add a little more water and knead until it holds together.
- Use high-quality masa harina specifically labeled for tortillas or tamales for best texture.
- Keep cooked gorditas warm wrapped in a clean kitchen towel until ready to serve.
- Feel free to customize the filling with meats chorizo or your favorite salsas for authentic flavor.

