

Arepas con Queso are golden cornmeal pockets crisped to perfection and filled with melting queso blanco in every bite. Crispy edges give way to a tender interior where gooey cheese oozes with each pull—an easy-to-shape corn disk griddled until golden for a cheesy surprise that’s perfect for satisfying snack cravings or kicking off your day. With just five ingredients and beginner-friendly steps, you’ll have warm, cheesy arepas ready in under 20 minutes, making them an irresistible treat to share with friends and family.
Key Ingredients
Gather these simple components to whip up perfect Arepas con Queso with minimal fuss but maximum flavor.
- 2 cups masarepa (pre-cooked corn flour): Base ingredient that forms the tender, slightly nutty dough.
- 2 cups warm water: Hydrates the masarepa, creating a soft, pliable dough.
- 1 teaspoon salt: Enhances the corn’s natural sweetness and balances the flavors.
- 2 tablespoons vegetable oil divided: Helps crisp the exterior and prevents sticking.
- 1 cup shredded queso blanco: Melty filling that oozes out for that signature cheesy surprise.
How To Make Arepas con Queso
Turning simple dough into golden discs with a cheesy center is easier than you think. You’ll mix the ingredients into a soft dough, shape each portion into a round patty, and then griddle them until they’re crispy on the outside and tender inside. Once they’re cooked, you’ll carefully split each arepa and fill it with shredded queso blanco, allowing the warmth to coax the cheese into a gooey pocket you can’t resist.
1. In a bowl, combine the masarepa, warm water, salt, and half of the vegetable oil. Mix with your hands or a spoon until a smooth, soft dough forms without any cracks.
2. Divide the dough into equal portions (about 6–8, depending on size) and shape each piece into a ¾-inch thick disc, smoothing edges so the arepas hold together.
3. Heat the remaining tablespoon of oil in a skillet over medium heat until it shimmers, ensuring the pan is evenly coated.
4. Place the arepas in the skillet and cook undisturbed for about 5 minutes on each side, or until they develop a golden-brown, crispy crust.
5. Remove the arepas from the skillet and let them rest for a minute so steam settles.
6. Carefully split open each arepa with a small knife or your fingers to create a pocket without tearing the outer crust.
7. Fill each pocket with shredded queso blanco and press gently so the cheese melts slightly into the warm interior before serving.
Serving Suggestions
These cheesy corn pockets shine on their own, but you can elevate them with simple toppings and sides. Try pairing your warm arepas with a cool dip or a bright garnish to balance the richness of the cheese. The contrast between the crispy shell and gooey center makes for a snack or breakfast that feels both comforting and festive. Here are a few ideas to inspire your next plate:
- Fresh avocado slices: Add creamy texture and a mild flavor that complements the salty cheese.
- Pico de gallo: Bright tomatoes, onion, and cilantro provide a zesty counterpoint.
- Fried egg topper: Place a sunny-side-up egg on each arepa for a hearty breakfast twist.
- Drizzle of hot sauce: A few drops of your favorite chili sauce amp up the heat and flavor.
Tips For Perfect Arepas con Queso
Mastering these little cornmeal wonders takes just a few insider tricks. Keep your dough supple, your skillet well-heated, and your cheese ready to melt for seamless assembly. With a few adjustments, you can customize each batch to suit your taste—whether that means extra crispiness, a different cheese, or impeccable reheating for leftovers. Follow these friendly tips and you’ll be turning out perfect arepas every time:
- If the dough feels too dry, add more water by the tablespoon until it’s soft and pliable without cracking.
- For extra crispiness, cook the arepas on a well-seasoned cast iron skillet, pressing gently with a spatula.
- Queso blanco can be substituted with mozzarella, queso fresco, or any melty cheese you have on hand.
- Leftover arepas store well in an airtight container in the refrigerator and can be reheated in the oven for a crisp finish.
How To Store It
Once you’ve experienced the cheesy goodness of fresh arepas, you’ll want to keep them around for later. Proper storage ensures they stay moist inside and retain enough warmth to revive that crispy exterior when reheated. Follow these methods to hold onto that just-made texture and flavor for days:
- Refrigerate in an airtight container: Cool completely, then store for up to 3 days to maintain freshness.
- Freeze for longer storage: Wrap each arepa individually in plastic wrap, then place in a freezer bag for up to 1 month.
- Reheat in the oven: Preheat to 350°F (175°C) and bake for 5–7 minutes until hot and crispy again.
- Skillet refresh: Warm in a lightly oiled skillet over medium heat for 2–3 minutes per side to revive that golden crust.
Frequently Asked Questions
Here are some quick answers to common questions about making and enjoying your cheesy Arepas con Queso:
- Q: How long does it take to prepare and cook the Arepas con Queso?
A: It takes about 10 minutes to mix the dough and shape the discs, plus about 10 minutes of cooking time (5 minutes per side). In total, plan for approximately 20 minutes from start to finish.
- Q: What consistency should the dough have and how do I fix it if it’s too dry or too sticky?
A: The dough should be soft, smooth, and pliable without cracks. If it feels too dry or cracks when you shape it, add warm water one tablespoon at a time until it holds together. If it’s too sticky, let it rest for a few minutes so the masarepa absorbs moisture, then gently knead in a little more flour.
- Q: Can I substitute the vegetable oil with another fat or cooking method?
A: Yes. While vegetable oil ensures even browning, you can use another neutral oil like canola or light olive oil. For a richer flavor, clarified butter (ghee) works well. You can also dry-cook the arepas on a well-seasoned cast iron skillet using only a light spray of oil to achieve crispiness.
- Q: Which cheeses work best if I don’t have queso blanco?
A: Queso blanco melts nicely but can be swapped with mozzarella for stretchiness, queso fresco for a mild tang, or any semi-soft melting cheese. Avoid very hard or crumbly cheeses, as they won’t achieve that creamy pocket filling.
- Q: How do I get extra crispy arepas with a golden-brown crust?
A: Use a well-seasoned cast iron or nonstick skillet and ensure it’s preheated over medium heat before adding the arepas. Cook them undisturbed for the full 5 minutes per side so they form a firm, golden crust. A slightly lower heat can help them cook through without burning the exterior.
- Q: What’s the best way to split open the arepa and fill it without tearing it?
A: After cooking, let each arepa rest for a minute so steam subsides. Insert a small serrated knife about halfway through the edge and gently twist to create a pocket. Open it slowly with your fingers and spoon in the shredded cheese, then press closed briefly so the cheese melts into the warm interior.
- Q: How should I store and reheat leftover arepas?
A: Cool leftovers completely, then place them in an airtight container in the refrigerator for up to 3 days. To reheat, warm them in a preheated oven at 350°F (175°C) for 5–7 minutes until heated through and crispy again. You can also reheat in a skillet over medium heat with a light brush of oil.
What Makes This Special
There’s something delightfully playful about splitting open a golden arepa and watching cheese stretch between your fingers. These Arepas con Queso work because they marry the humble simplicity of masarepa with the irresistible pull of melted queso blanco, delivering satisfaction in every bite. The crispy shell and tender interior create a perfect textural harmony that’s hard to beat. Go ahead and print this recipe for safekeeping, and don’t forget to share your kitchen triumphs or any questions you have in the comments—your feedback makes cooking even more fun!
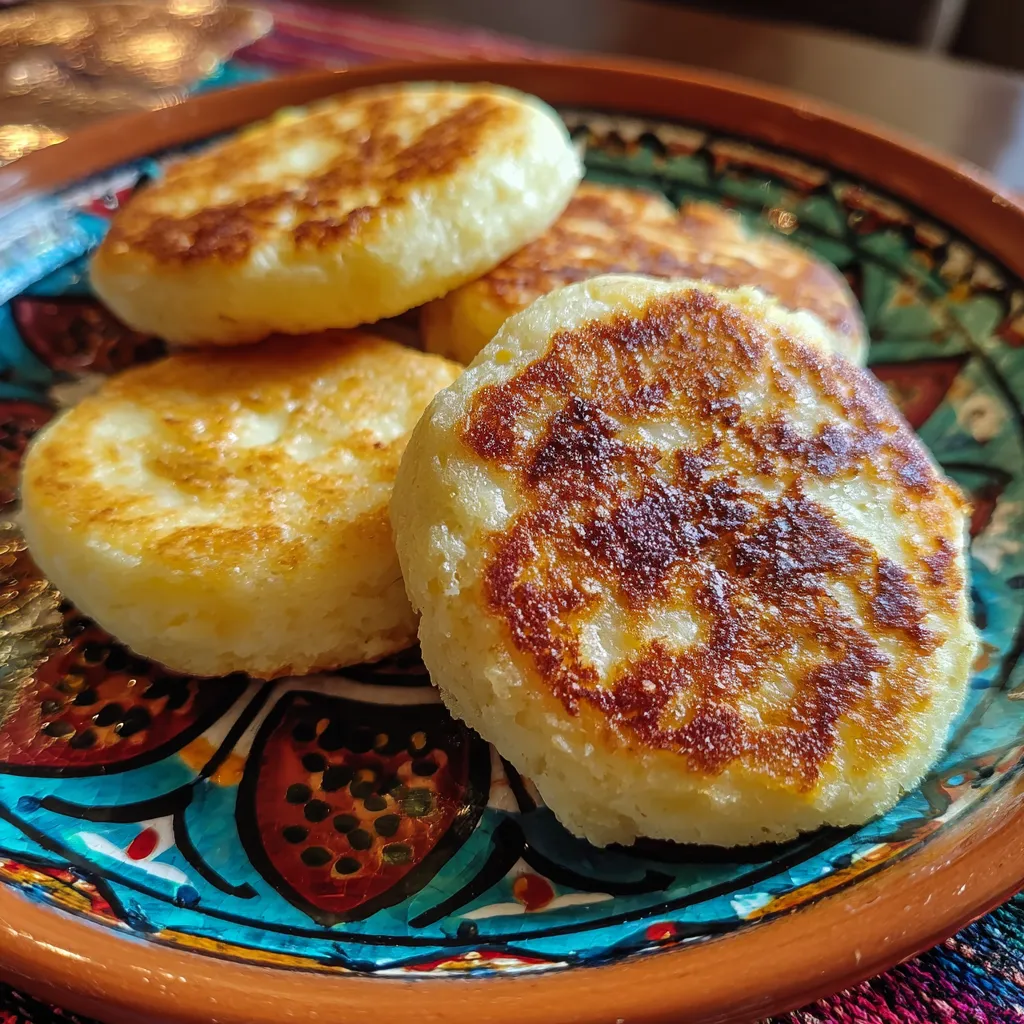

Arepas con Queso
Description
Crispy edges give way to a tender, warm interior where gooey queso blanco oozes with each pull. These easy-to-shape corn disks are griddled until golden and then split open for a cheesy surprise. Perfect for satisfying snack cravings.
Ingredients
Instructions
-
In a bowl combine masarepa, warm water, salt, and half of the oil. Mix until a soft dough forms.
-
Divide the dough into equal portions and shape each into a ¾-inch thick disc.
-
Heat the remaining oil in a skillet over medium heat.
-
Cook the arepas for about 5 minutes on each side, until golden brown and crispy.
-
Remove the arepas from the skillet and let rest briefly.
-
Carefully split open each arepa to create a pocket.
-
Fill the pockets with shredded queso blanco and allow the cheese to melt slightly before serving.
Note
- If the dough feels too dry, add more water by the tablespoon until pliable
- For extra crispiness, cook the arepas on a well-seasoned cast iron skillet
- Queso blanco can be substituted with mozzarella, queso fresco, or any melty cheese
- Leftover arepas store well in an airtight container in the refrigerator and can be reheated in the oven

