

Nothing captures the essence of crisp autumn mornings quite like a pan of warm, homemade apple pie bars fresh from the oven. These bars blend tender, thinly sliced apples with a buttery crust and a crumbly topping that crackles under your fork. Each bite delivers a cozy combination of sweet brown sugar, zingy lemon juice, and a whisper of nutmeg, while the cinnamon wraps it all up in that classic fall-spice embrace. Whether you’re pulling these out for a family gathering or craving a snug night in with a mug of tea, they promise to be the comforting treat you reach for when you want something both familiar and delightfully new.
Beyond just flavor, these apple pie bars are refreshingly easy—perfect for beginner bakers or seasoned enthusiasts looking for a no-fuss dessert that still wows. You’ll spend about 30 minutes prepping, another 45 to 50 minutes baking, and then let the bars rest for 10 minutes before diving in. At roughly 250 calories per serving (when cut into 12 squares), they strike a lovely balance between indulgence and portion control. Savor the sweet, spiced goodness of homemade apple pie bars that capture fall in every bite, and watch how quickly they disappear when you serve them at holiday meals, casual brunches, or cozy coffee dates with friends.
KEY INGREDIENTS IN APPLE PIE BARS
Every outstanding apple pie bar begins with quality ingredients that work together to create that perfect harmony of texture and taste. Below are the stars of this recipe and the role each one plays in building layers of flavor:
- All-purpose flour
Provides structure for both the buttery crust and tender crumb topping, ensuring a perfect balance between flaky and sturdy.
- Granulated sugar
Sweetens the crust and filling, helping to caramelize apple juices during baking for that irresistible golden hue.
- Salt
Enhances all the flavors, cutting through the sweetness to accentuate the buttery notes and bright fruit.
- Unsalted butter
Delivers richness and a melt-in-your-mouth texture; chilled cubes create a crumbly crust when cut into the flour, while melted butter binds the topping.
- Large egg
Acts as a binder in the crust mixture, giving it just enough cohesion without weighing it down.
- Apples
The heart of the bars—firm varieties like Granny Smith or Honeycrisp hold their shape, offering a tender, juicy filling with a subtle tartness.
- Brown sugar
Deepens the sweetness and adds a hint of molasses flavor to both the filling and oat-based topping.
- Ground cinnamon
Infuses every bite with warm, spicy notes that evoke cozy autumnal memories.
- Nutmeg
A pinch enhances complexity, rounding out the spice profile with a gentle, nutty aroma.
- Lemon juice
Brightens the fruit, preventing browning and balancing the sweetness with a refreshing tang.
- Vanilla extract
Rounds out the flavors, adding a smooth, aromatic finish to the apple mixture.
- Cornstarch
Thickens the filling juices as the bars bake, ensuring each square holds together beautifully.
- Old-fashioned oats
Contribute a hearty texture to the crumb topping, offering a rustic contrast to the tender apples.
- Chopped walnuts or pecans (optional)
Brings an extra layer of crunch and nutty richness, making the topping even more irresistible.
HOW TO MAKE APPLE PIE BARS
This recipe is broken down into simple stages—making the crust, preparing the filling, assembling the layers, and baking to golden perfection. Follow each step, and you’ll end up with bars that are as stunning to look at as they are delicious to devour.
1. Preheat your oven to 350°F (175°C) and grease a 9×13-inch baking dish with butter or nonstick spray to ensure your bars release easily.
2. In a large mixing bowl, combine the all-purpose flour, granulated sugar, and salt. Whisk them briefly so every grain of sugar is coated in flour.
3. Using a pastry cutter or your fingers, cut the chilled, cubed butter into the flour mixture until it resembles coarse crumbs, with pea-sized bits of butter throughout.
4. Stir in the lightly beaten egg just until you see the mixture come together—avoid overmixing, or the crust can become tough.
5. Press about two-thirds of this mixture evenly into the bottom of the prepared baking dish to form a firm crust, then set the remaining crumbs aside for later.
6. In another bowl, prepare the apple filling. Combine thinly sliced apples with granulated sugar, brown sugar, cinnamon, nutmeg, lemon juice, vanilla extract, and cornstarch. Toss gently until each apple slice is coated with the spiced sugar blend.
7. Spread the apple mixture evenly over the crust layer, mounding it slightly in the center for generous filling in each bar.
8. To make the crumb topping, mix old-fashioned oats, brown sugar, flour, and melted butter in a small bowl. Stir in the chopped nuts if you’re using them.
9. Sprinkle the reserved crust mixture first, then top with the oat-nut mixture, creating a beautiful, textured blanket over the apples.
10. Bake in the preheated oven for 45–50 minutes, or until the top turns golden brown and the apples are tender when pierced with a fork.
11. Allow the apple pie bars to cool completely in the pan—this helps them set so you can cut clean, satisfying squares for serving.
SERVING SUGGESTIONS FOR APPLE PIE BARS
When these apple pie bars emerge from the oven, they’re begging to be dressed up and enjoyed in delightful ways. Here are a few of my favorite serving ideas that highlight their comforting flavors and satisfy every sweet craving:
- Serve warm with a generous scoop of vanilla ice cream on top, letting the cold cream melt into the spiced apples for a classic hot-and-cold contrast.
- Drizzle with homemade caramel sauce—simply heat brown sugar, butter, and cream until thickened—and watch as it pools into every nook of the crumb topping.
- Dust lightly with powdered sugar for an elegant, snow-kissed finish that’s perfect for holiday gatherings or afternoon tea.
- Pair each bar with a steaming cup of spiced chai tea or dark roast coffee to accentuate the cinnamon and nutmeg notes and make your dessert moment even cozier.
HOW TO STORE APPLE PIE BARS
After all that effort, you deserve to savor extra bars in the days ahead—and proper storage will keep them tasting just as fabulous as Day 1. Follow these tips to maintain freshness, flavor, and texture while you enjoy your apple pie bars over time:
- Room Temperature: For short-term enjoyment (up to 24 hours), store cooled bars in an airtight container on the counter. This preserves the crumbly topping and tender crust without drying them out.
- Refrigeration: If you want to keep them a bit longer (up to 3 days), place the bars in a sealed container or wrap tightly in plastic wrap and store in the fridge. Bring them to room temperature or warm briefly before serving.
- Freezing: For longer storage (up to 1 month), freeze cooled bars in a single layer on a baking sheet until firm, then transfer to a freezer-safe bag or container. Thaw overnight in the refrigerator or reheat individual bars directly in a warm oven.
- Reheating: To revive that fresh-baked crispness, warm bars at 325°F (160°C) for 5–7 minutes in the oven, or microwave a single square for 15–20 seconds on high. This melts the butter, refreshes the crumb, and revives the soft apple filling.
CONCLUSION
Recapping everything you need to know, these apple pie bars are a beginner-friendly, crowd-pleasing dessert that captures fall in every bite. With just a handful of pantry staples—flour, sugar, butter, and oats—you’ll create a flaky crust and tender crumb topping that bracket a layer of perfectly spiced apple filling. The process is straightforward: mix, press, layer, bake, and let rest. In around 30 minutes of prep and under an hour of total time, you’ll have 12 squares of pure comfort ready for your table. Whether you serve them warm from the oven with vanilla ice cream or save them for a cozy afternoon pick-me-up, each bar highlights the sweet, spiced goodness that makes this recipe so hard to resist.
Feel free to print this article and save it for later when those apple cravings strike or when you need a reliable fall dessert to impress guests. You’ll also find a helpful FAQ section below for any questions that pop up as you bake. If you decide to try the recipe, I would love to hear how it turned out—drop a comment with your results, questions, or any tips you discovered along the way. Your feedback helps make this recipe even better for everyone, so don’t hesitate to share your stories and sweet successes!
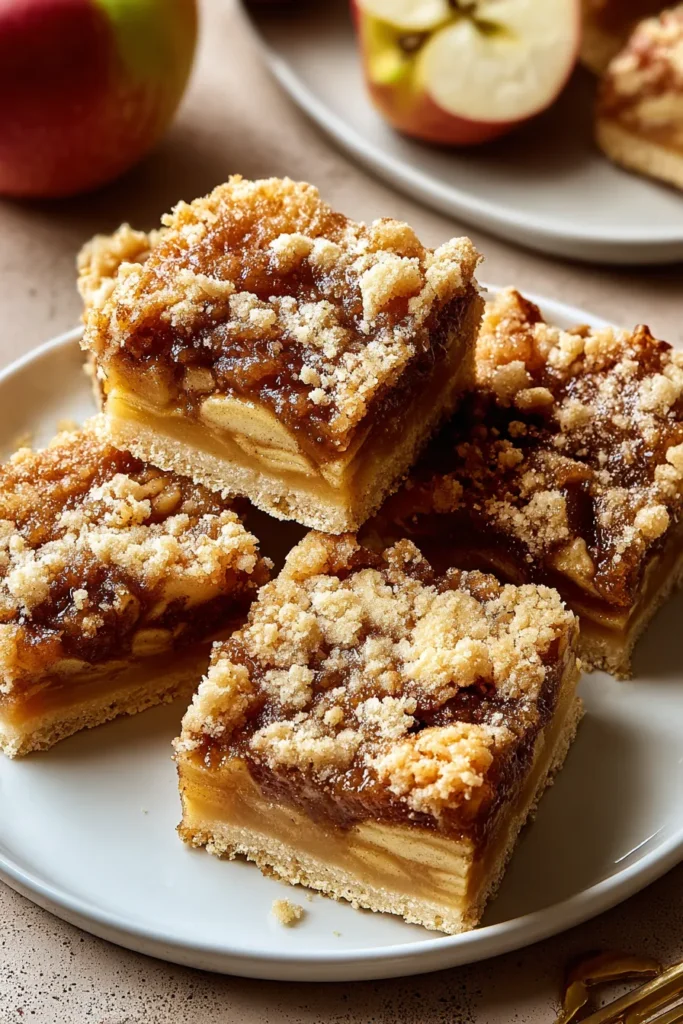

Apple Pie Bars
Description
These Apple Pie Bars combine tender apples, warm cinnamon, and a buttery crust for a comforting treat. Perfect for gatherings, they’re easy to make and hard to resist!
Ingredients
Instructions
-
Preheat your oven to 350°F (175°C) and grease a 9x13-inch baking dish.
-
In a large mixing bowl, combine 2 1/2 cups of flour, 2/3 cup of granulated sugar, and 1/2 teaspoon of salt.
-
Using a pastry cutter or your fingers, cut 1 cup of chilled, cubed butter into the flour mixture until it resembles coarse crumbs.
-
Stir in the lightly beaten egg until just combined.
-
Press about 2/3 of the mixture into the bottom of the prepared baking dish to form the crust and set the remaining mixture aside for later use.
-
In another bowl, prepare the apple filling. Combine 8 cups of thinly sliced apples with 1/2 cup of granulated sugar, 1/4 cup of brown sugar, 1 1/2 teaspoons of cinnamon, a pinch of nutmeg, 1 tablespoon of lemon juice, 1 teaspoon of vanilla extract, and 1 tablespoon of cornstarch. Toss until apples are evenly coated.
-
Spread the apple mixture evenly over the prepared crust in the baking dish.
-
To make the crumb topping, mix 1/2 cup of oats, 1/4 cup of brown sugar, 1/4 cup of flour, and 1/4 cup of melted butter in a small bowl. Stir in chopped nuts if using.
-
Sprinkle the reserved crust mixture and then the crumb topping mixture over the apple filling evenly.
-
Bake in the preheated oven for 45-50 minutes, or until the top is golden brown and the apples are tender.
-
Allow the apple pie bars to cool completely in the pan before cutting into squares for serving.
Note
- Serve warm with a scoop of vanilla ice cream or whipped cream for an extra treat.
- Can be stored in an airtight container in the refrigerator for up to 3 days.
- These bars are perfect for fall gatherings and holiday meals.
- Make sure to use firm apples like Granny Smith or Honeycrisp for the best texture.
- You can customize the topping by adding dried cranberries or raisins if desired.

